For decades, I’ve wanted to learn how to forge steel. I’ve been watching blacksmiths in person and on YouTube since I was a teenager. And then, while discussing it with my dad, he told me what I tell my students: Try it! See what happens. It’s obvious when I say it to someone else. It’s mindblowing when someone says it back to me.
I started with something small, and I’ve already learned a ton about what to do next time. I’m pleased with how this is coming out, but the real product here is experience.
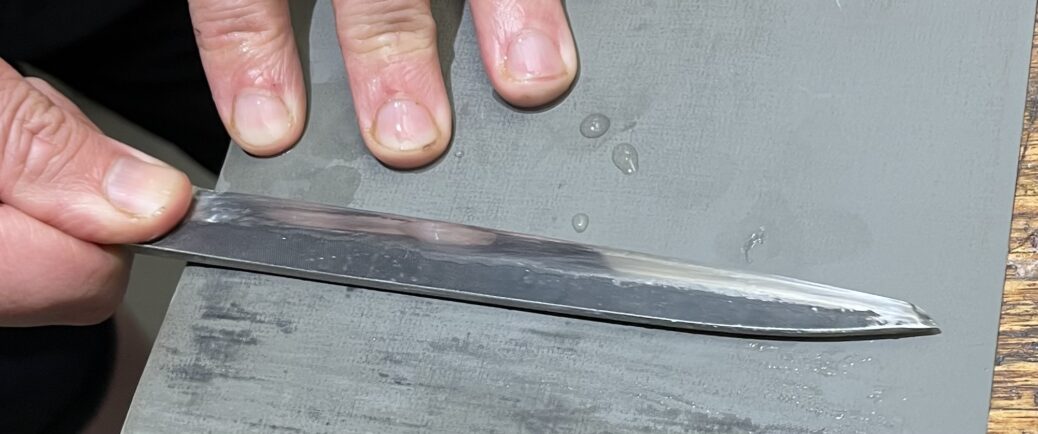
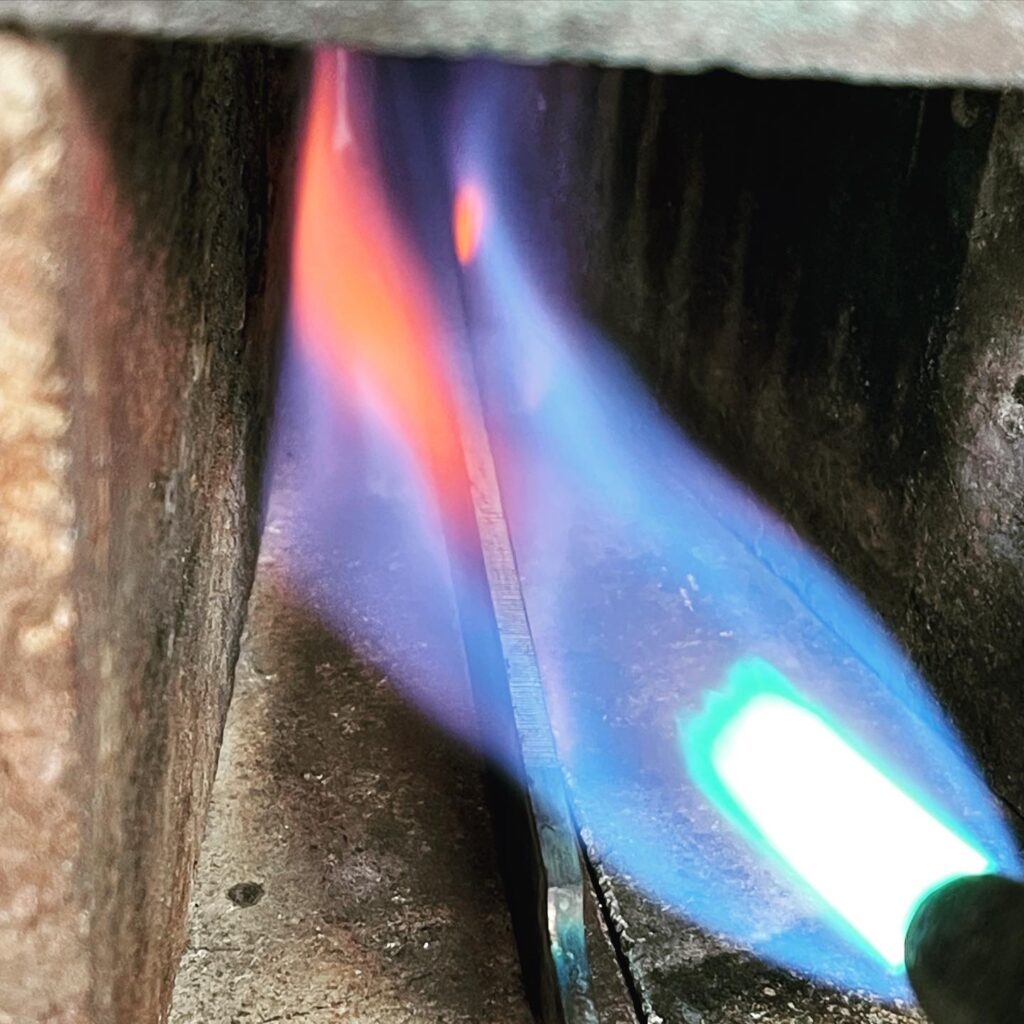
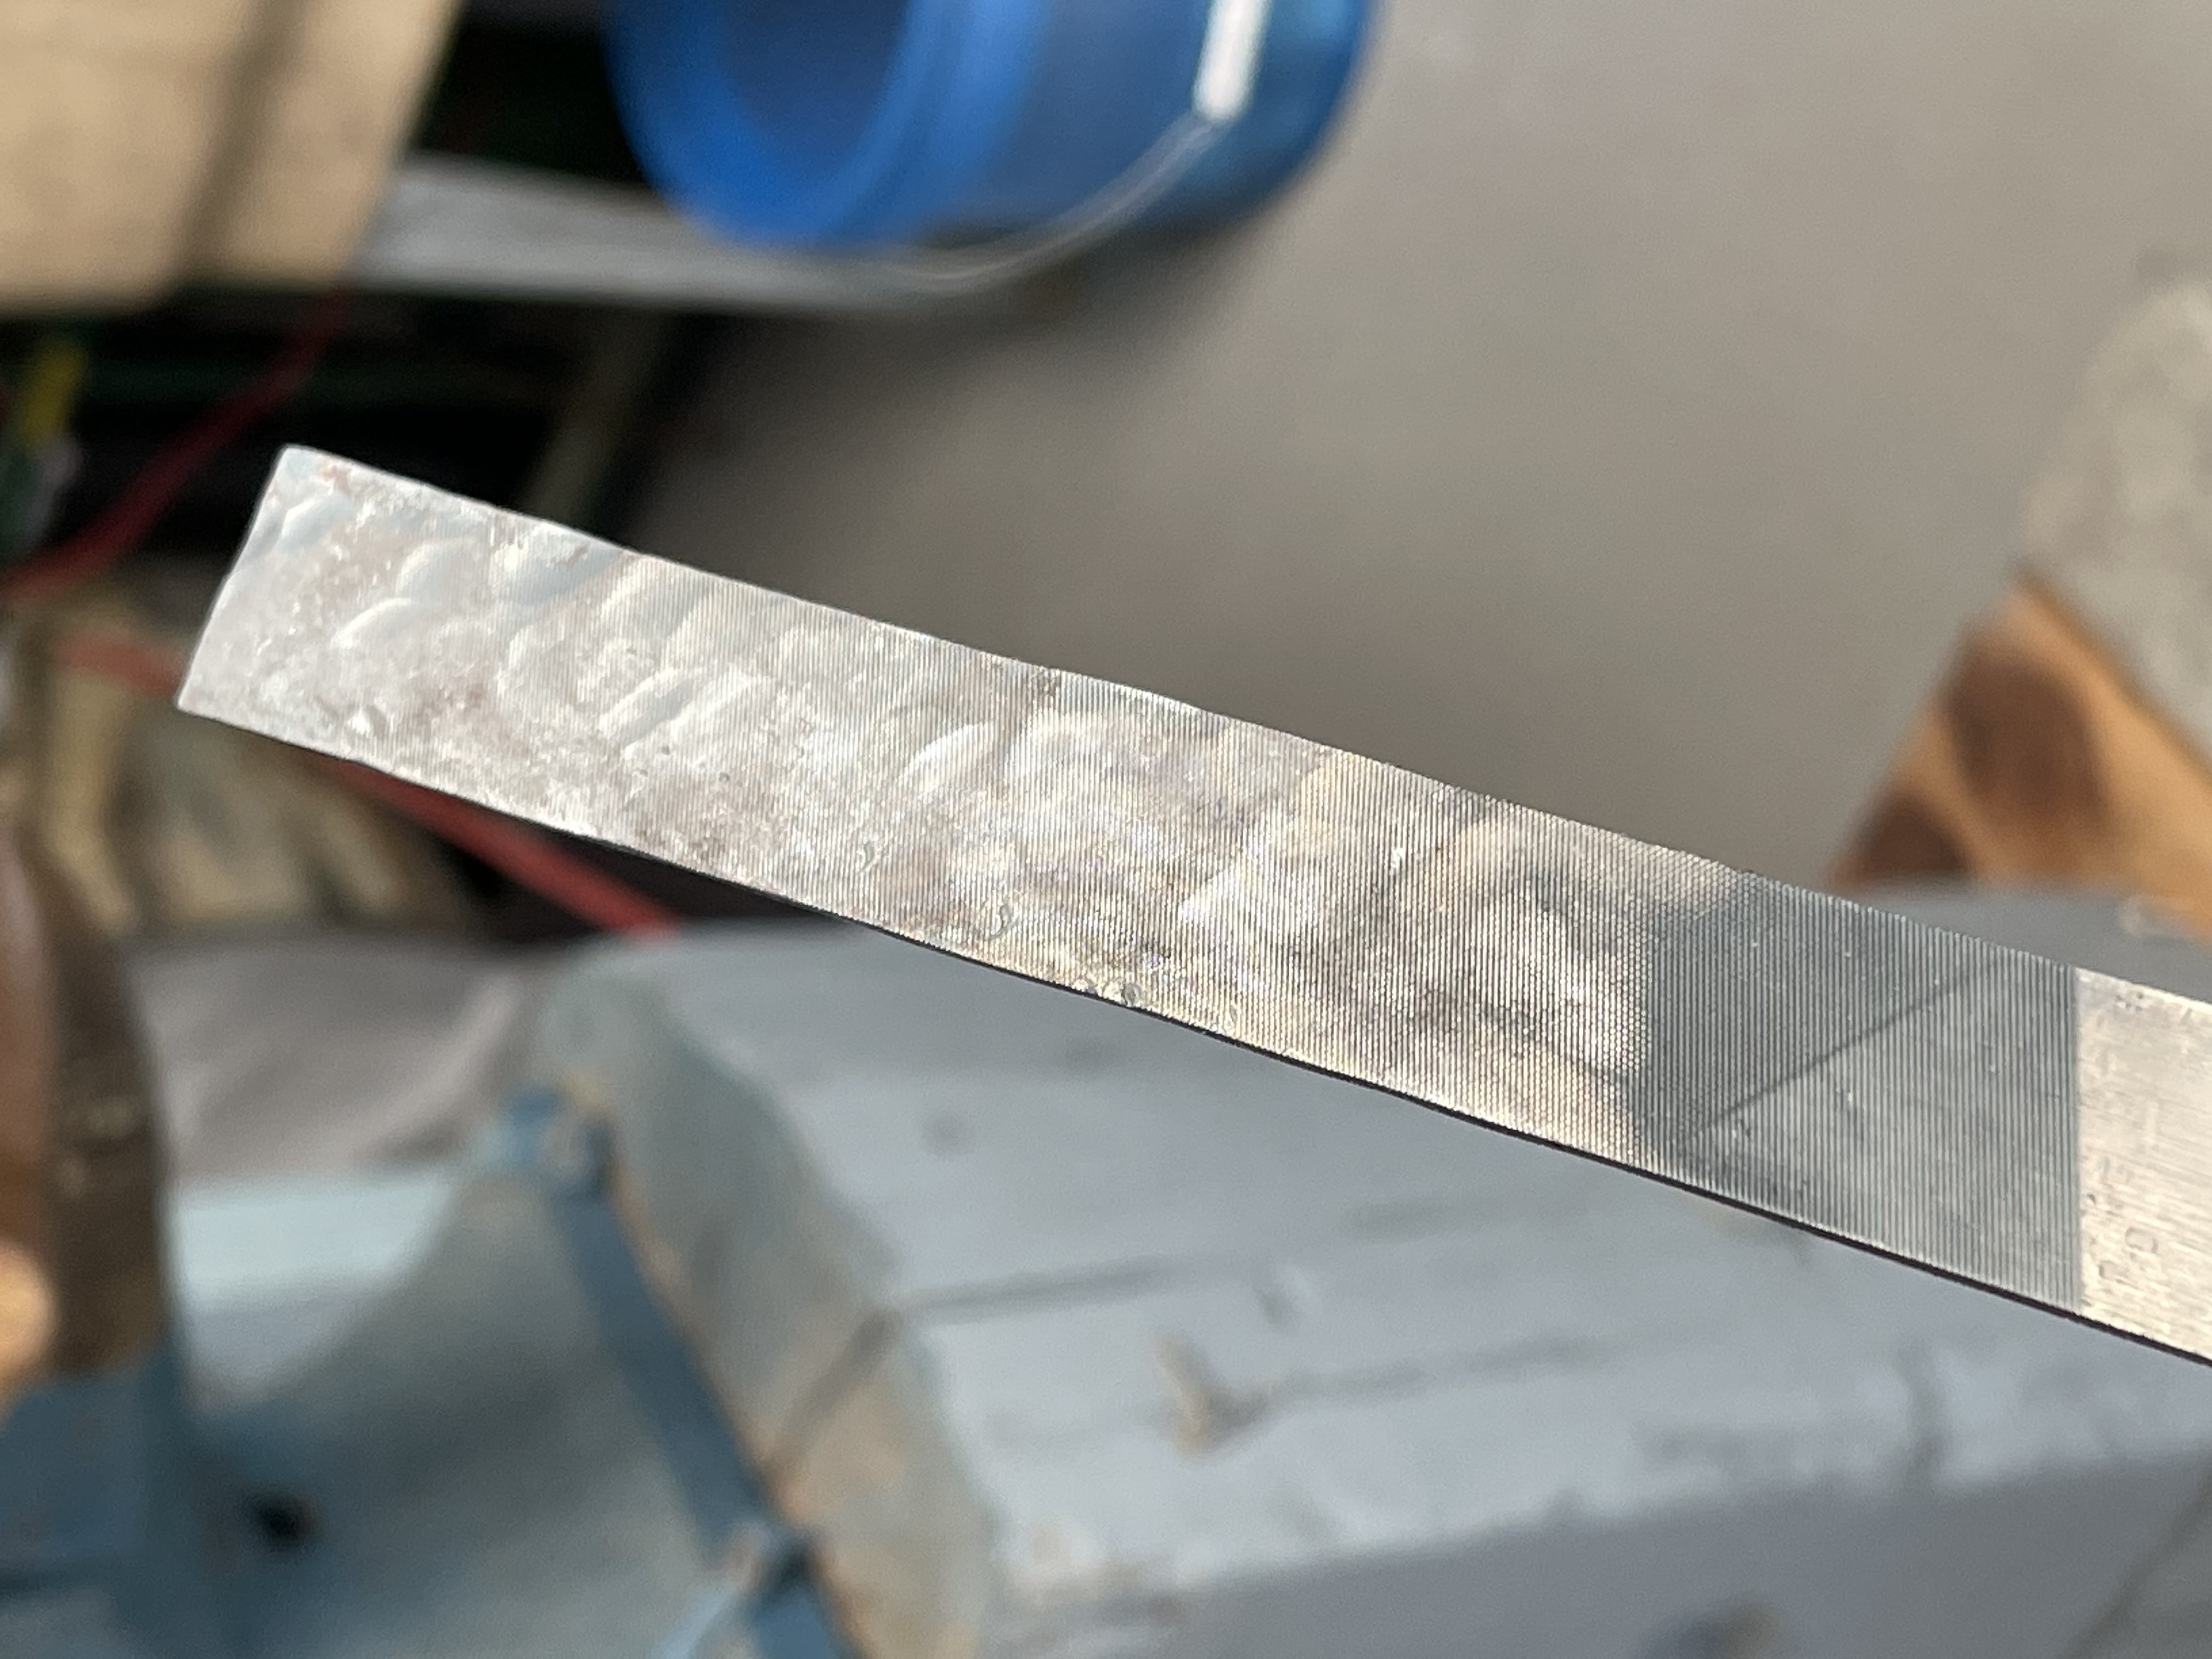
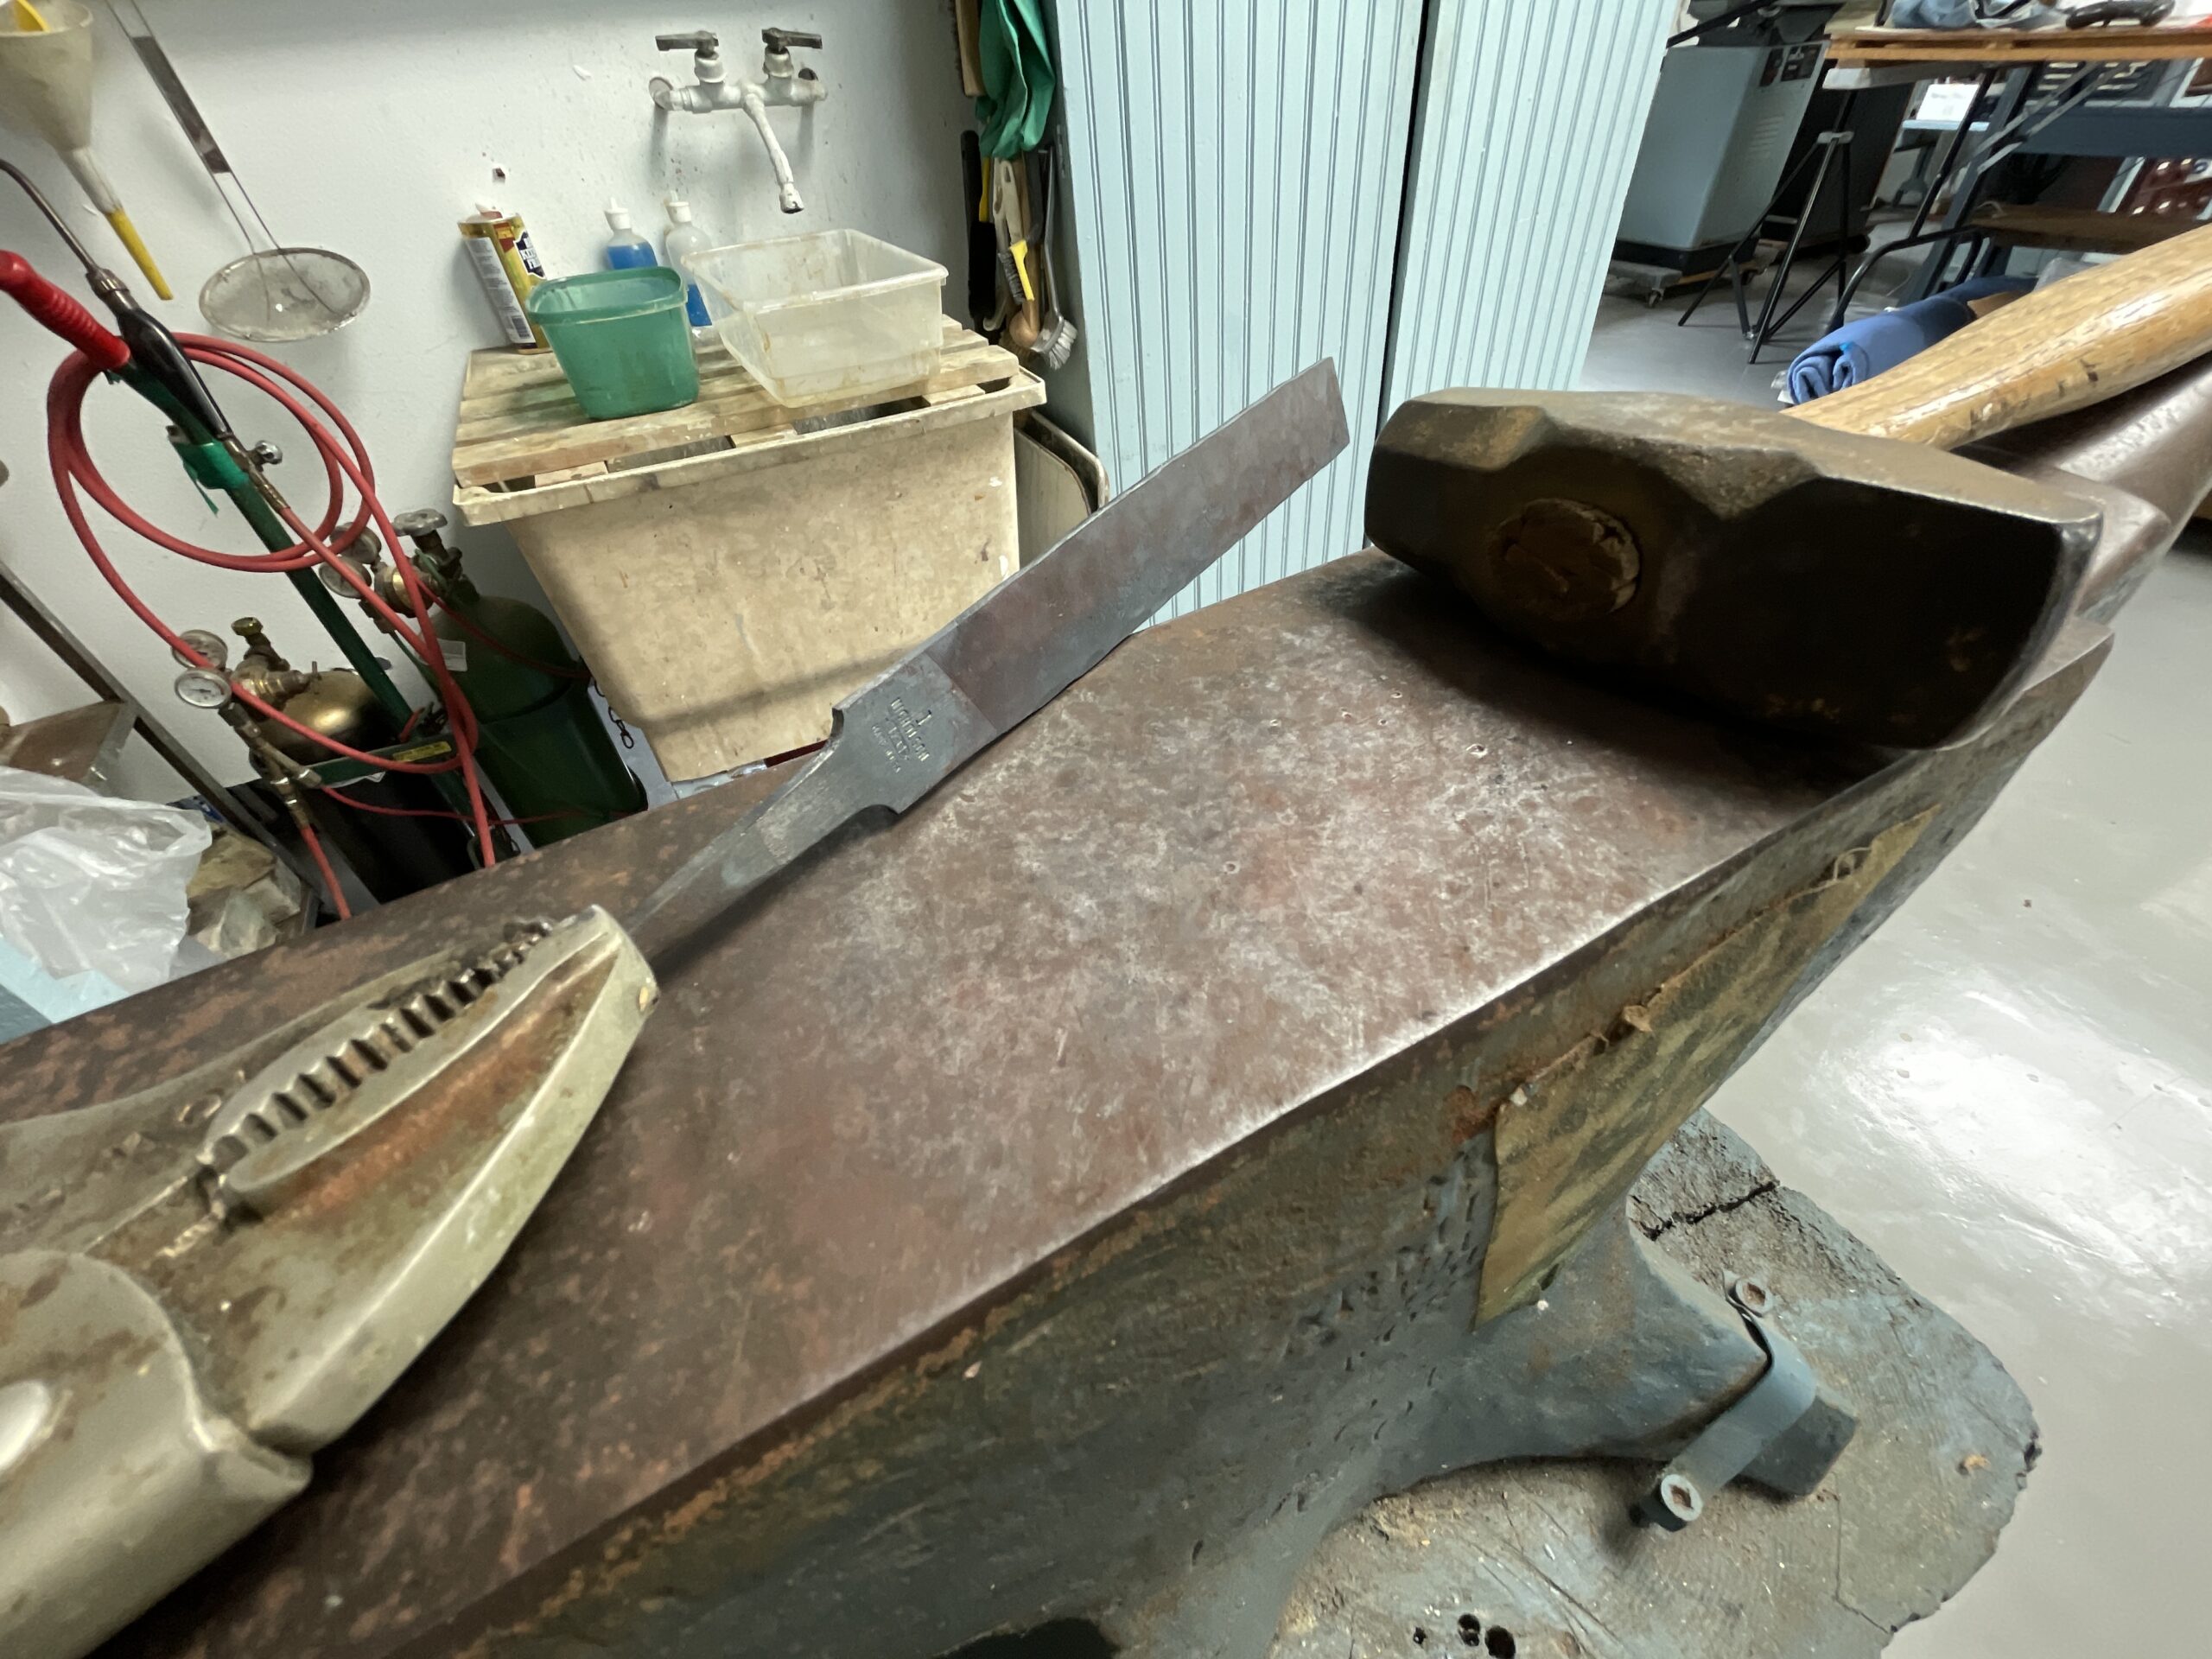
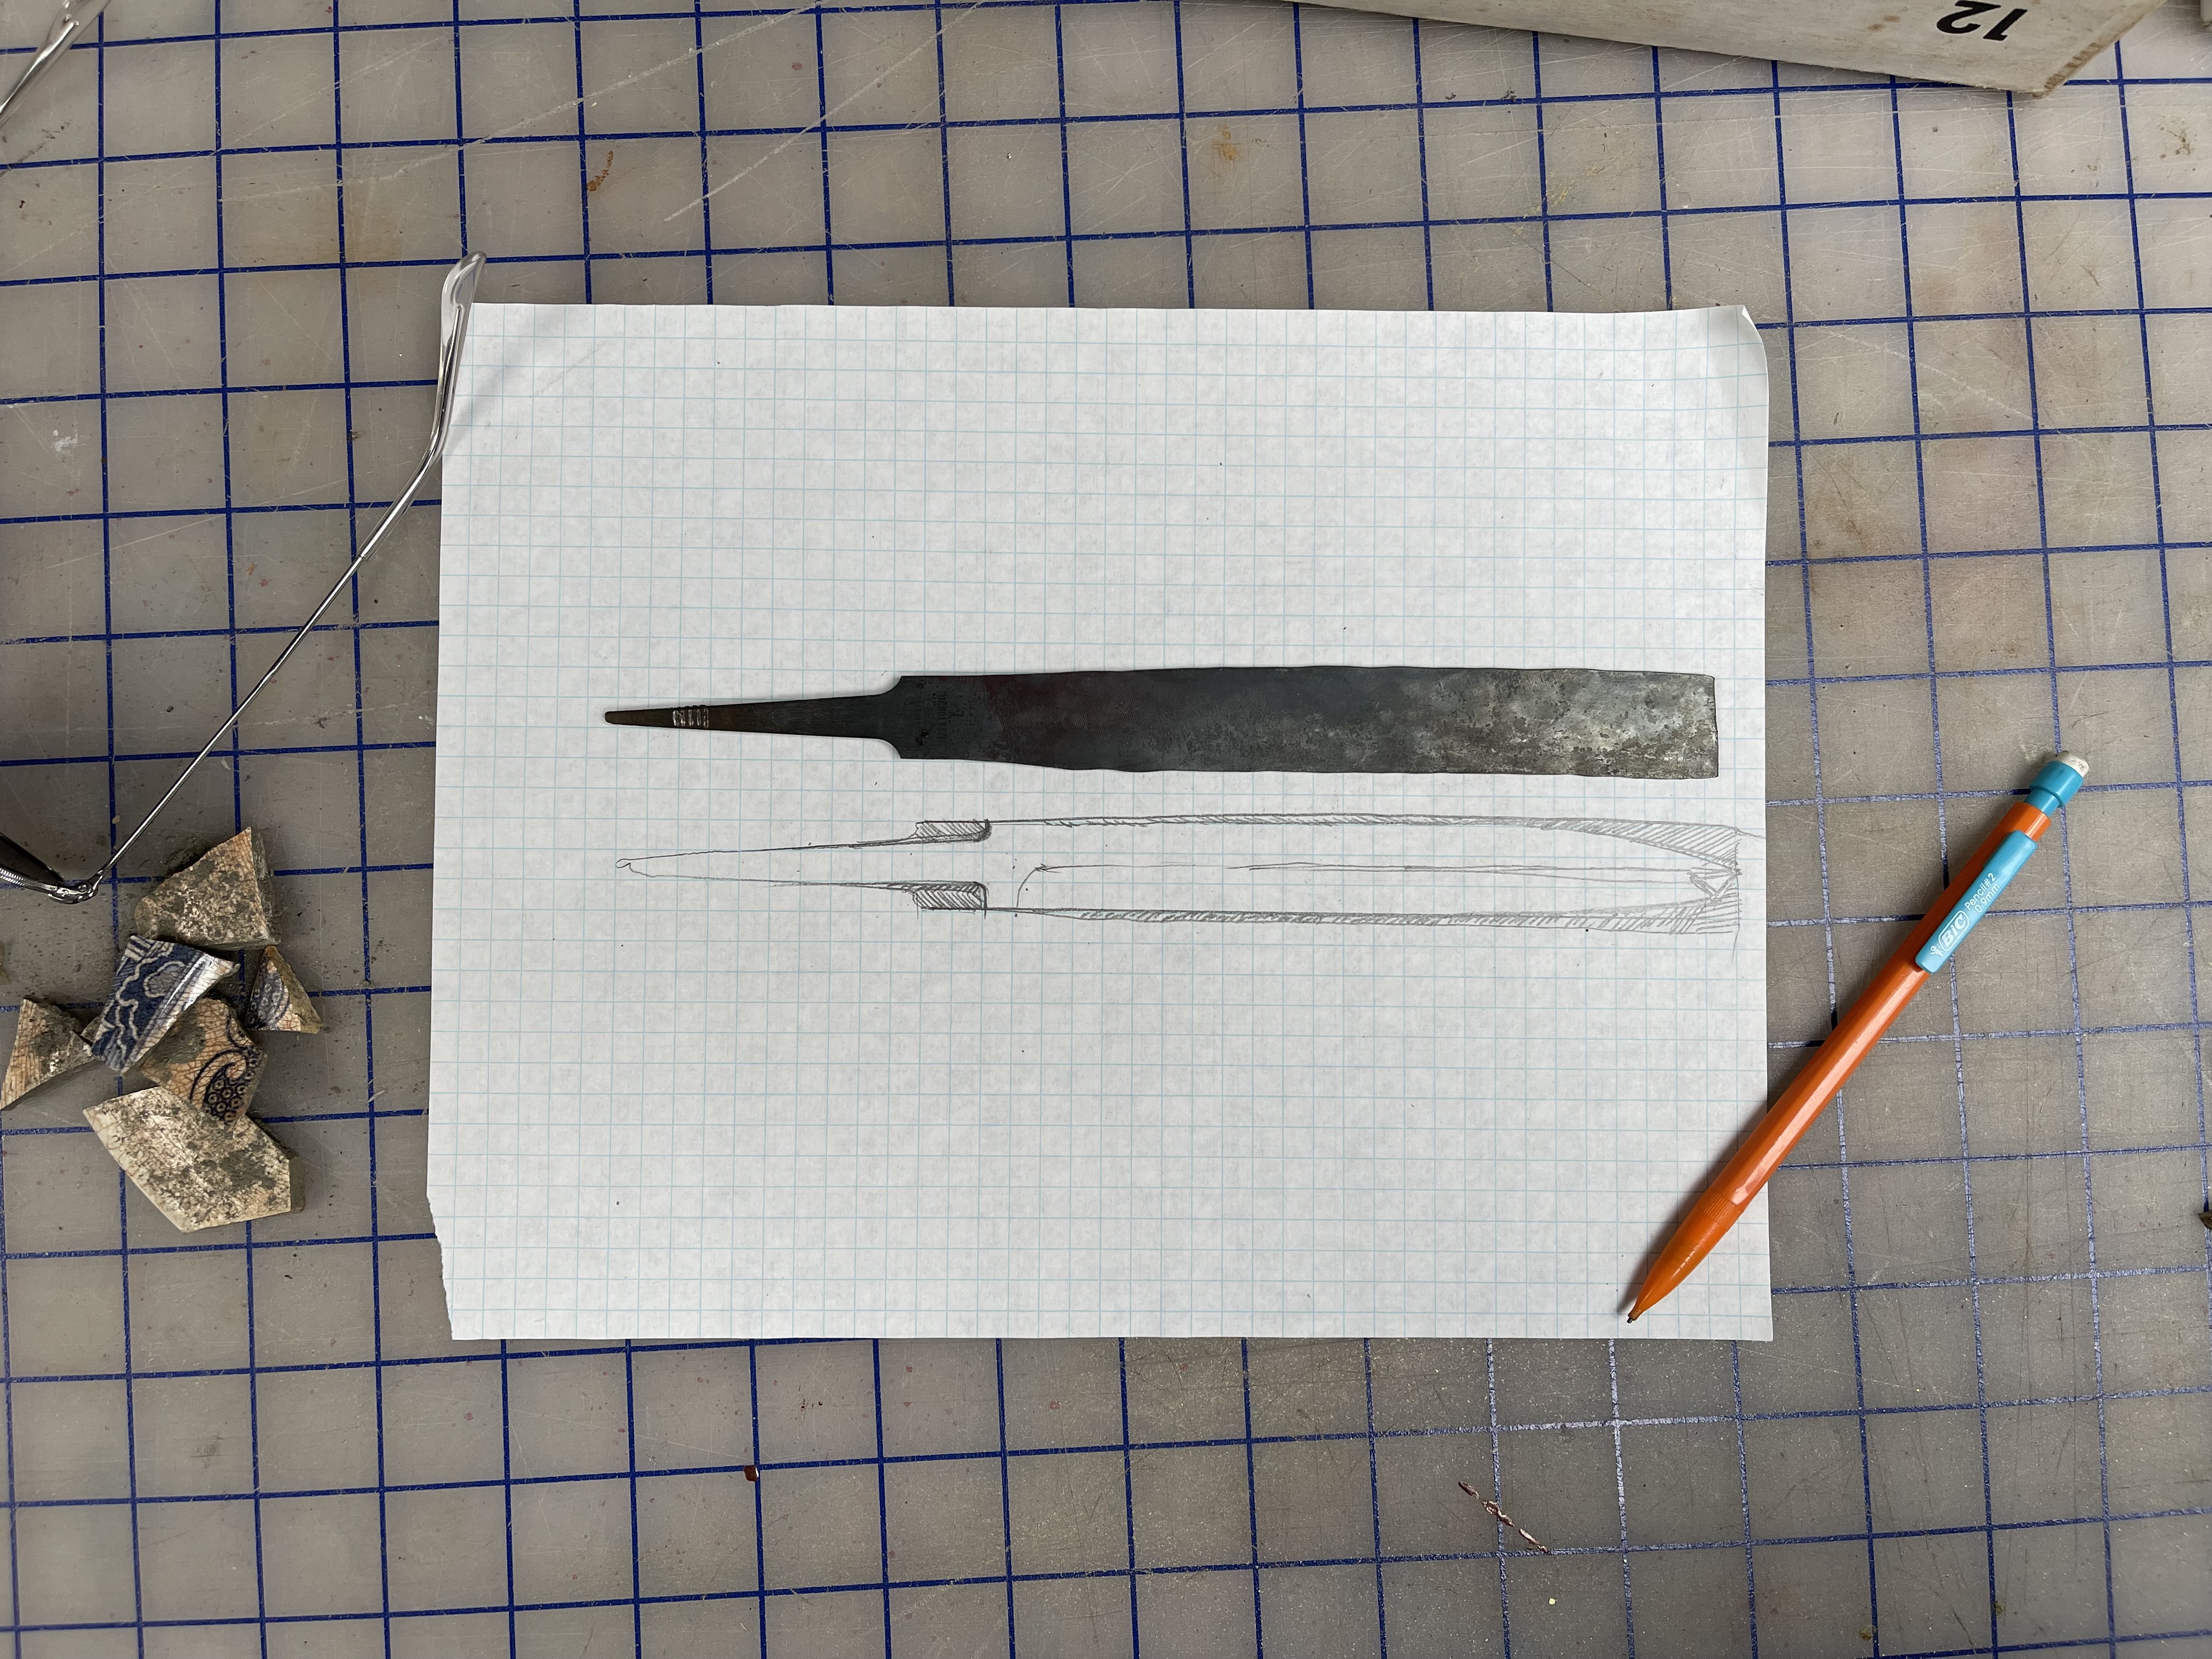
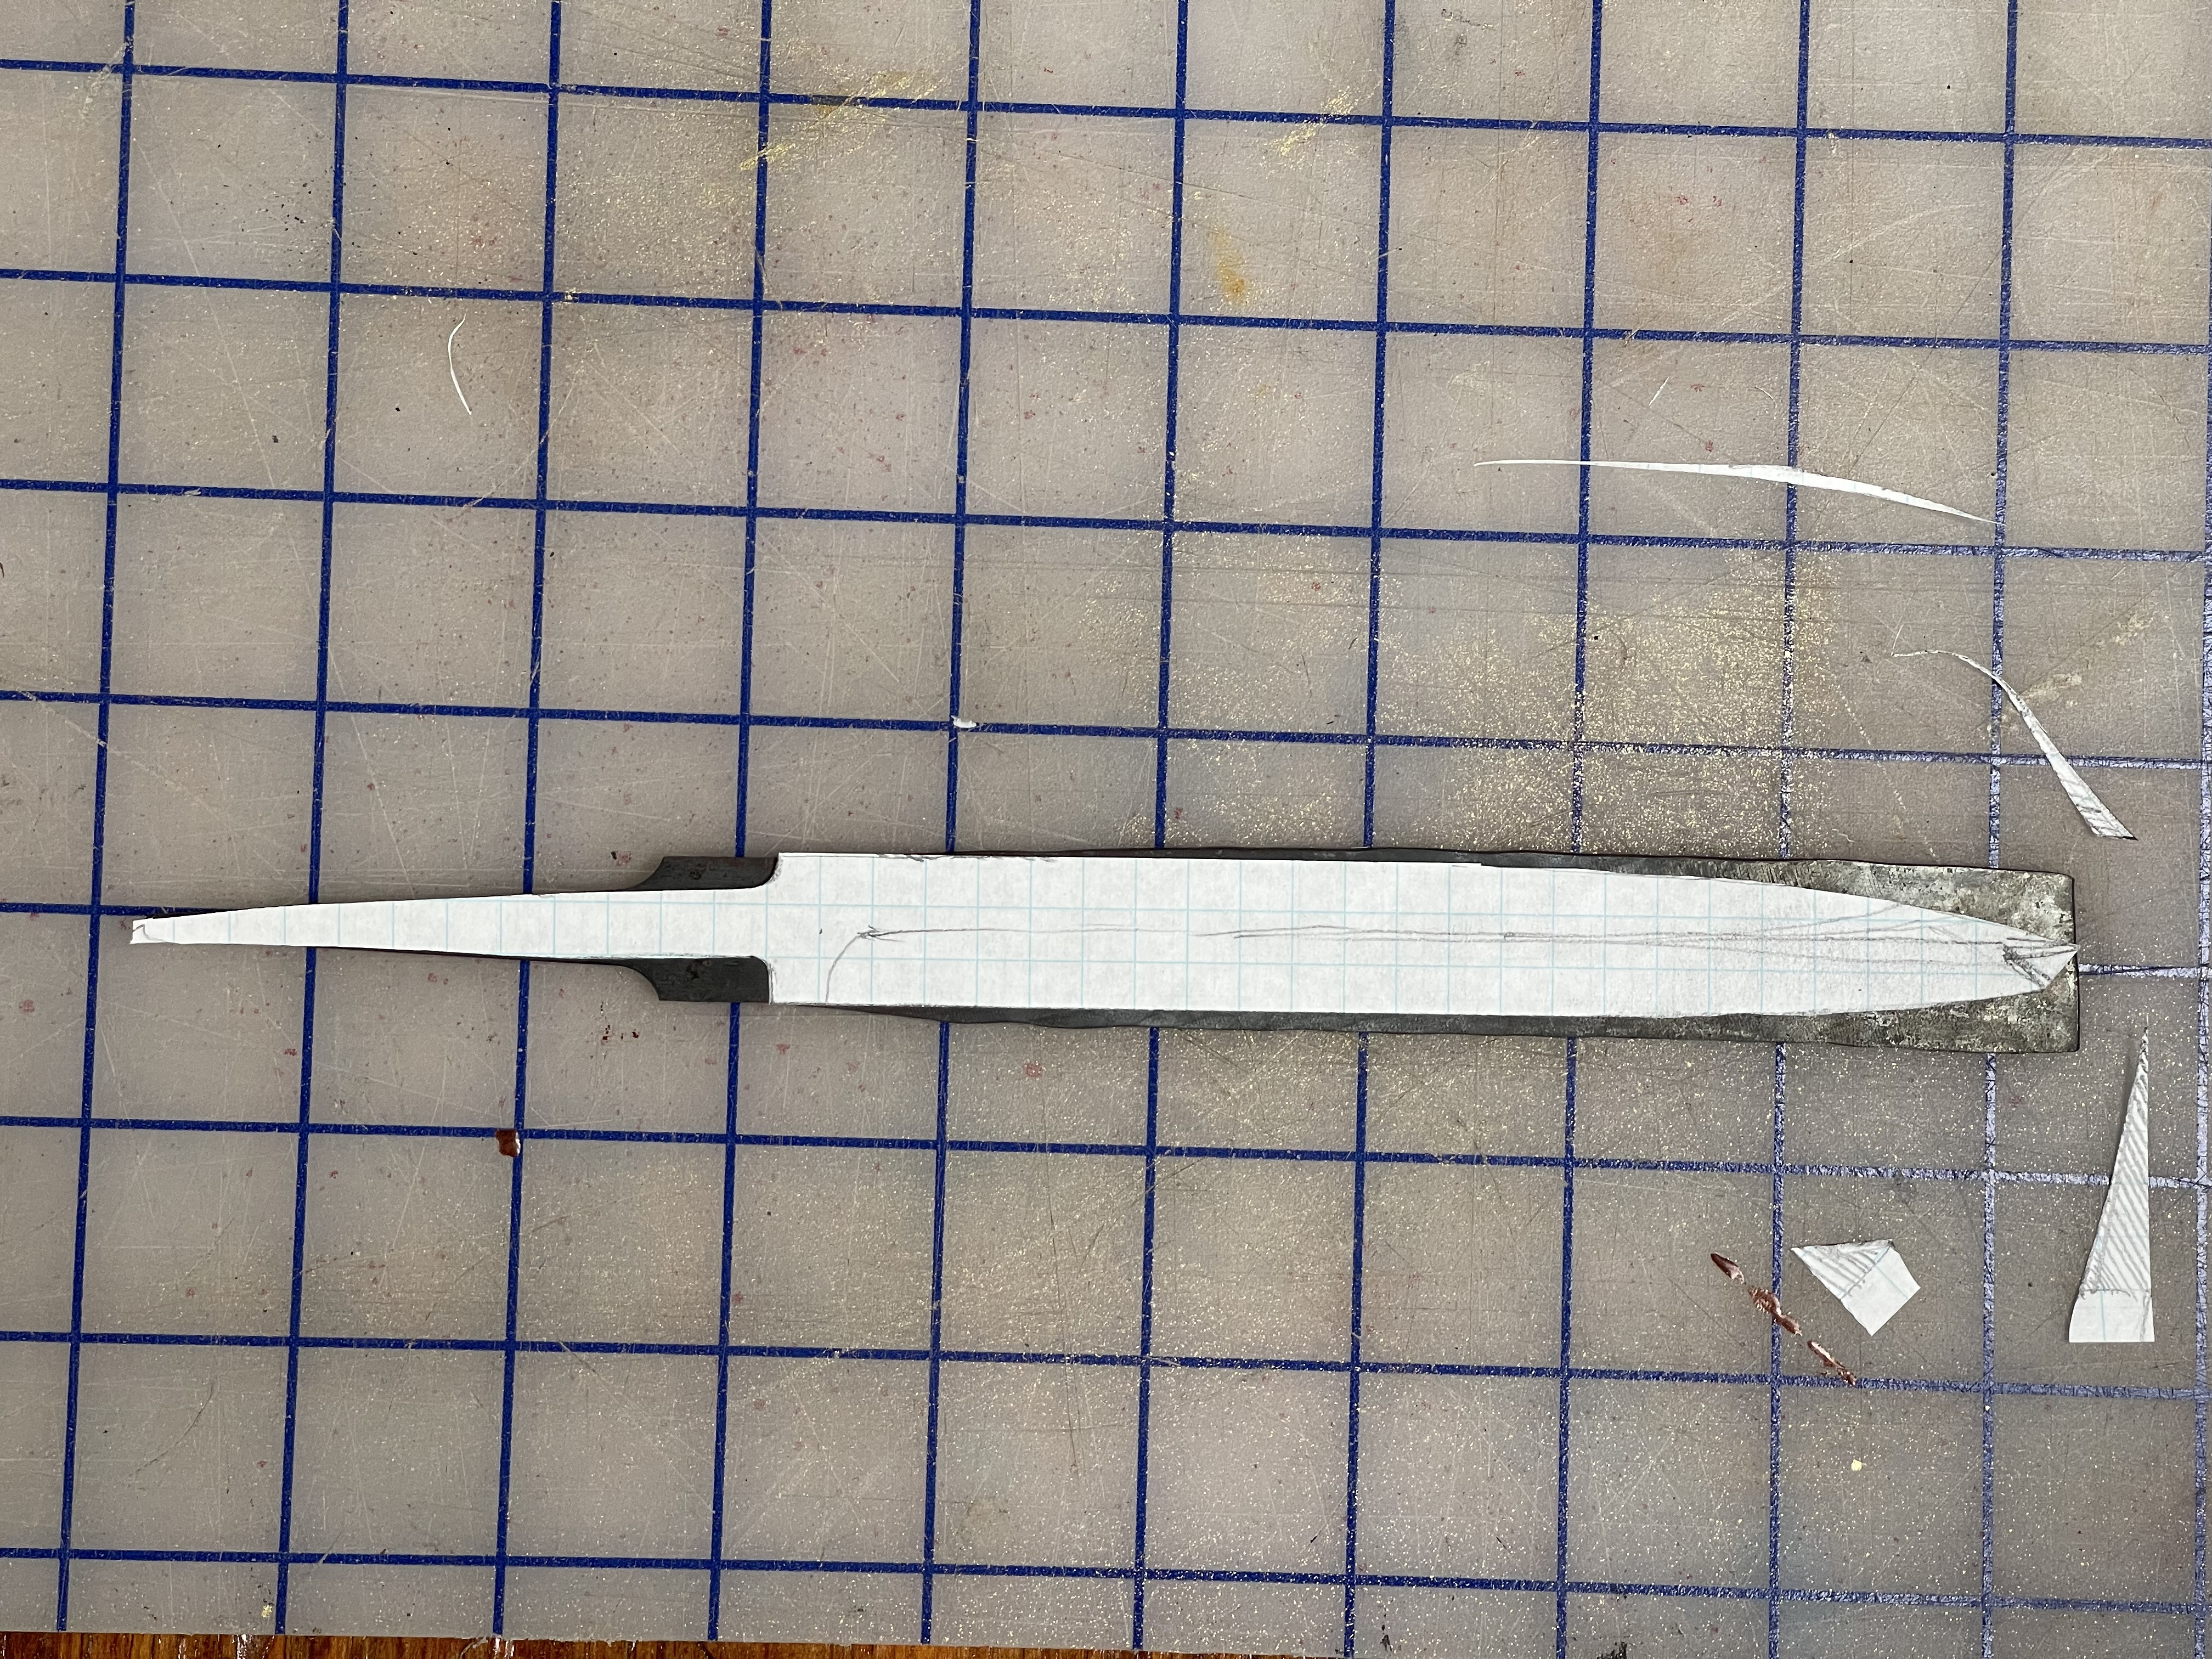
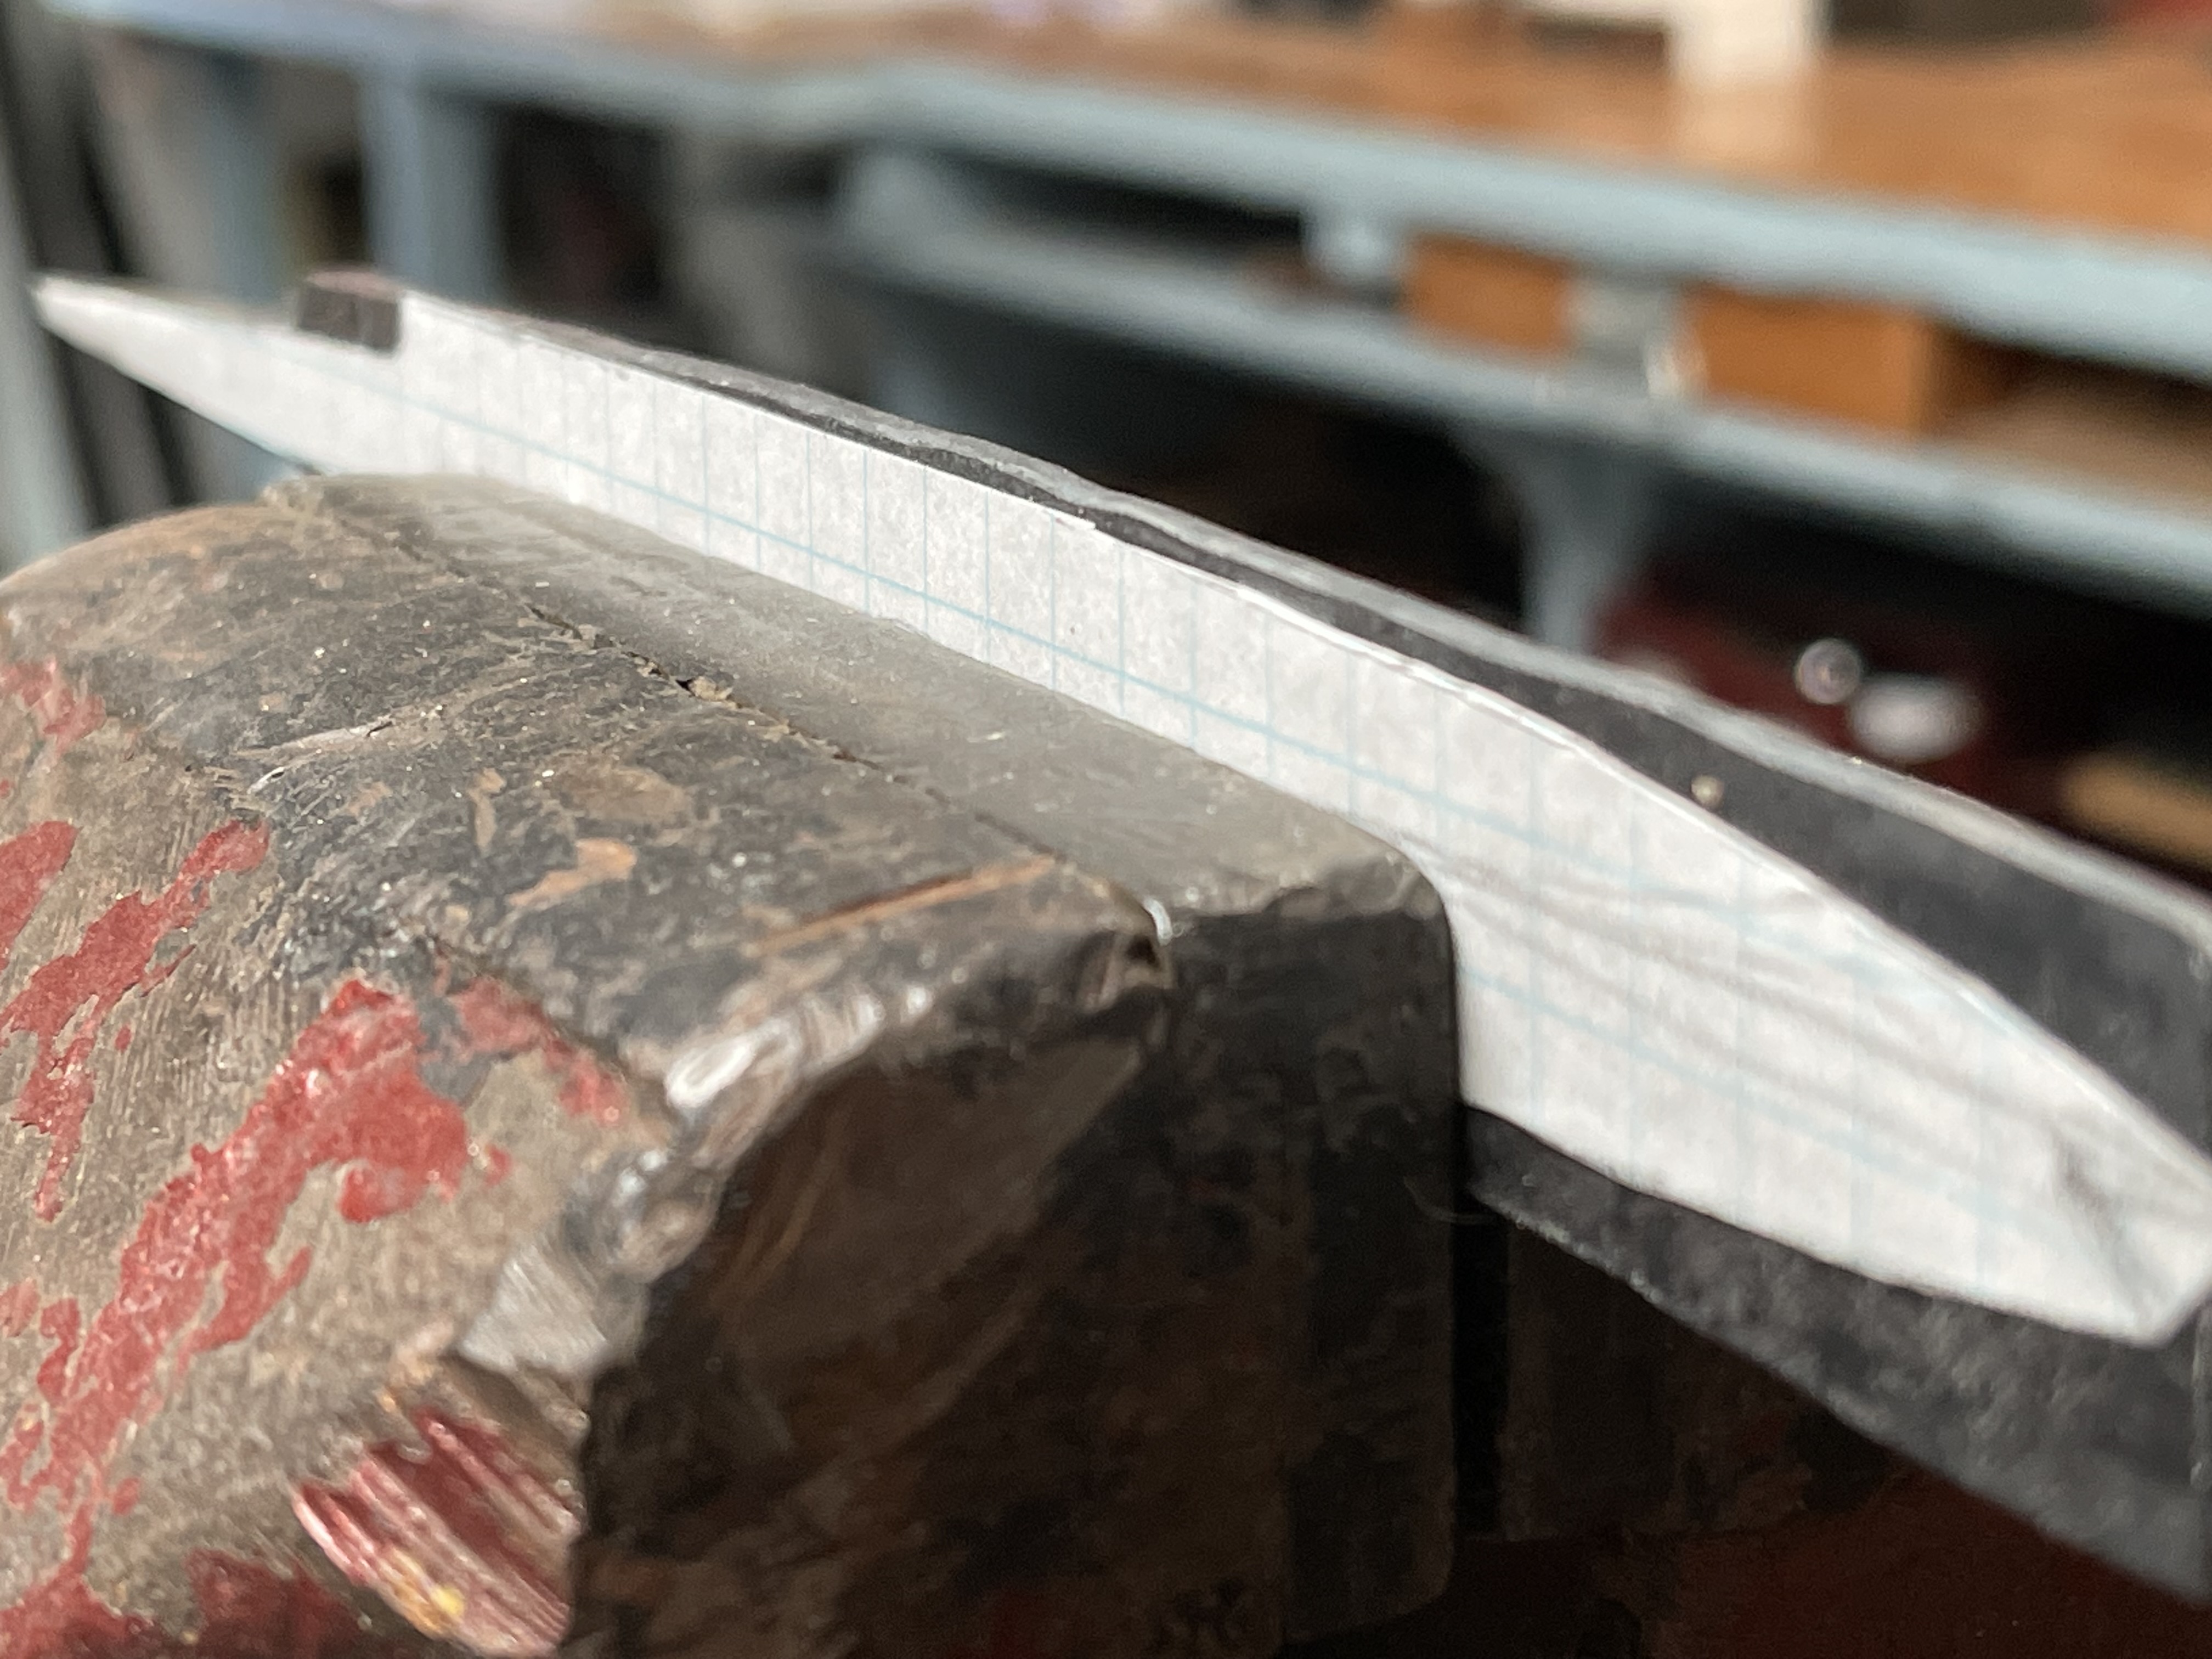
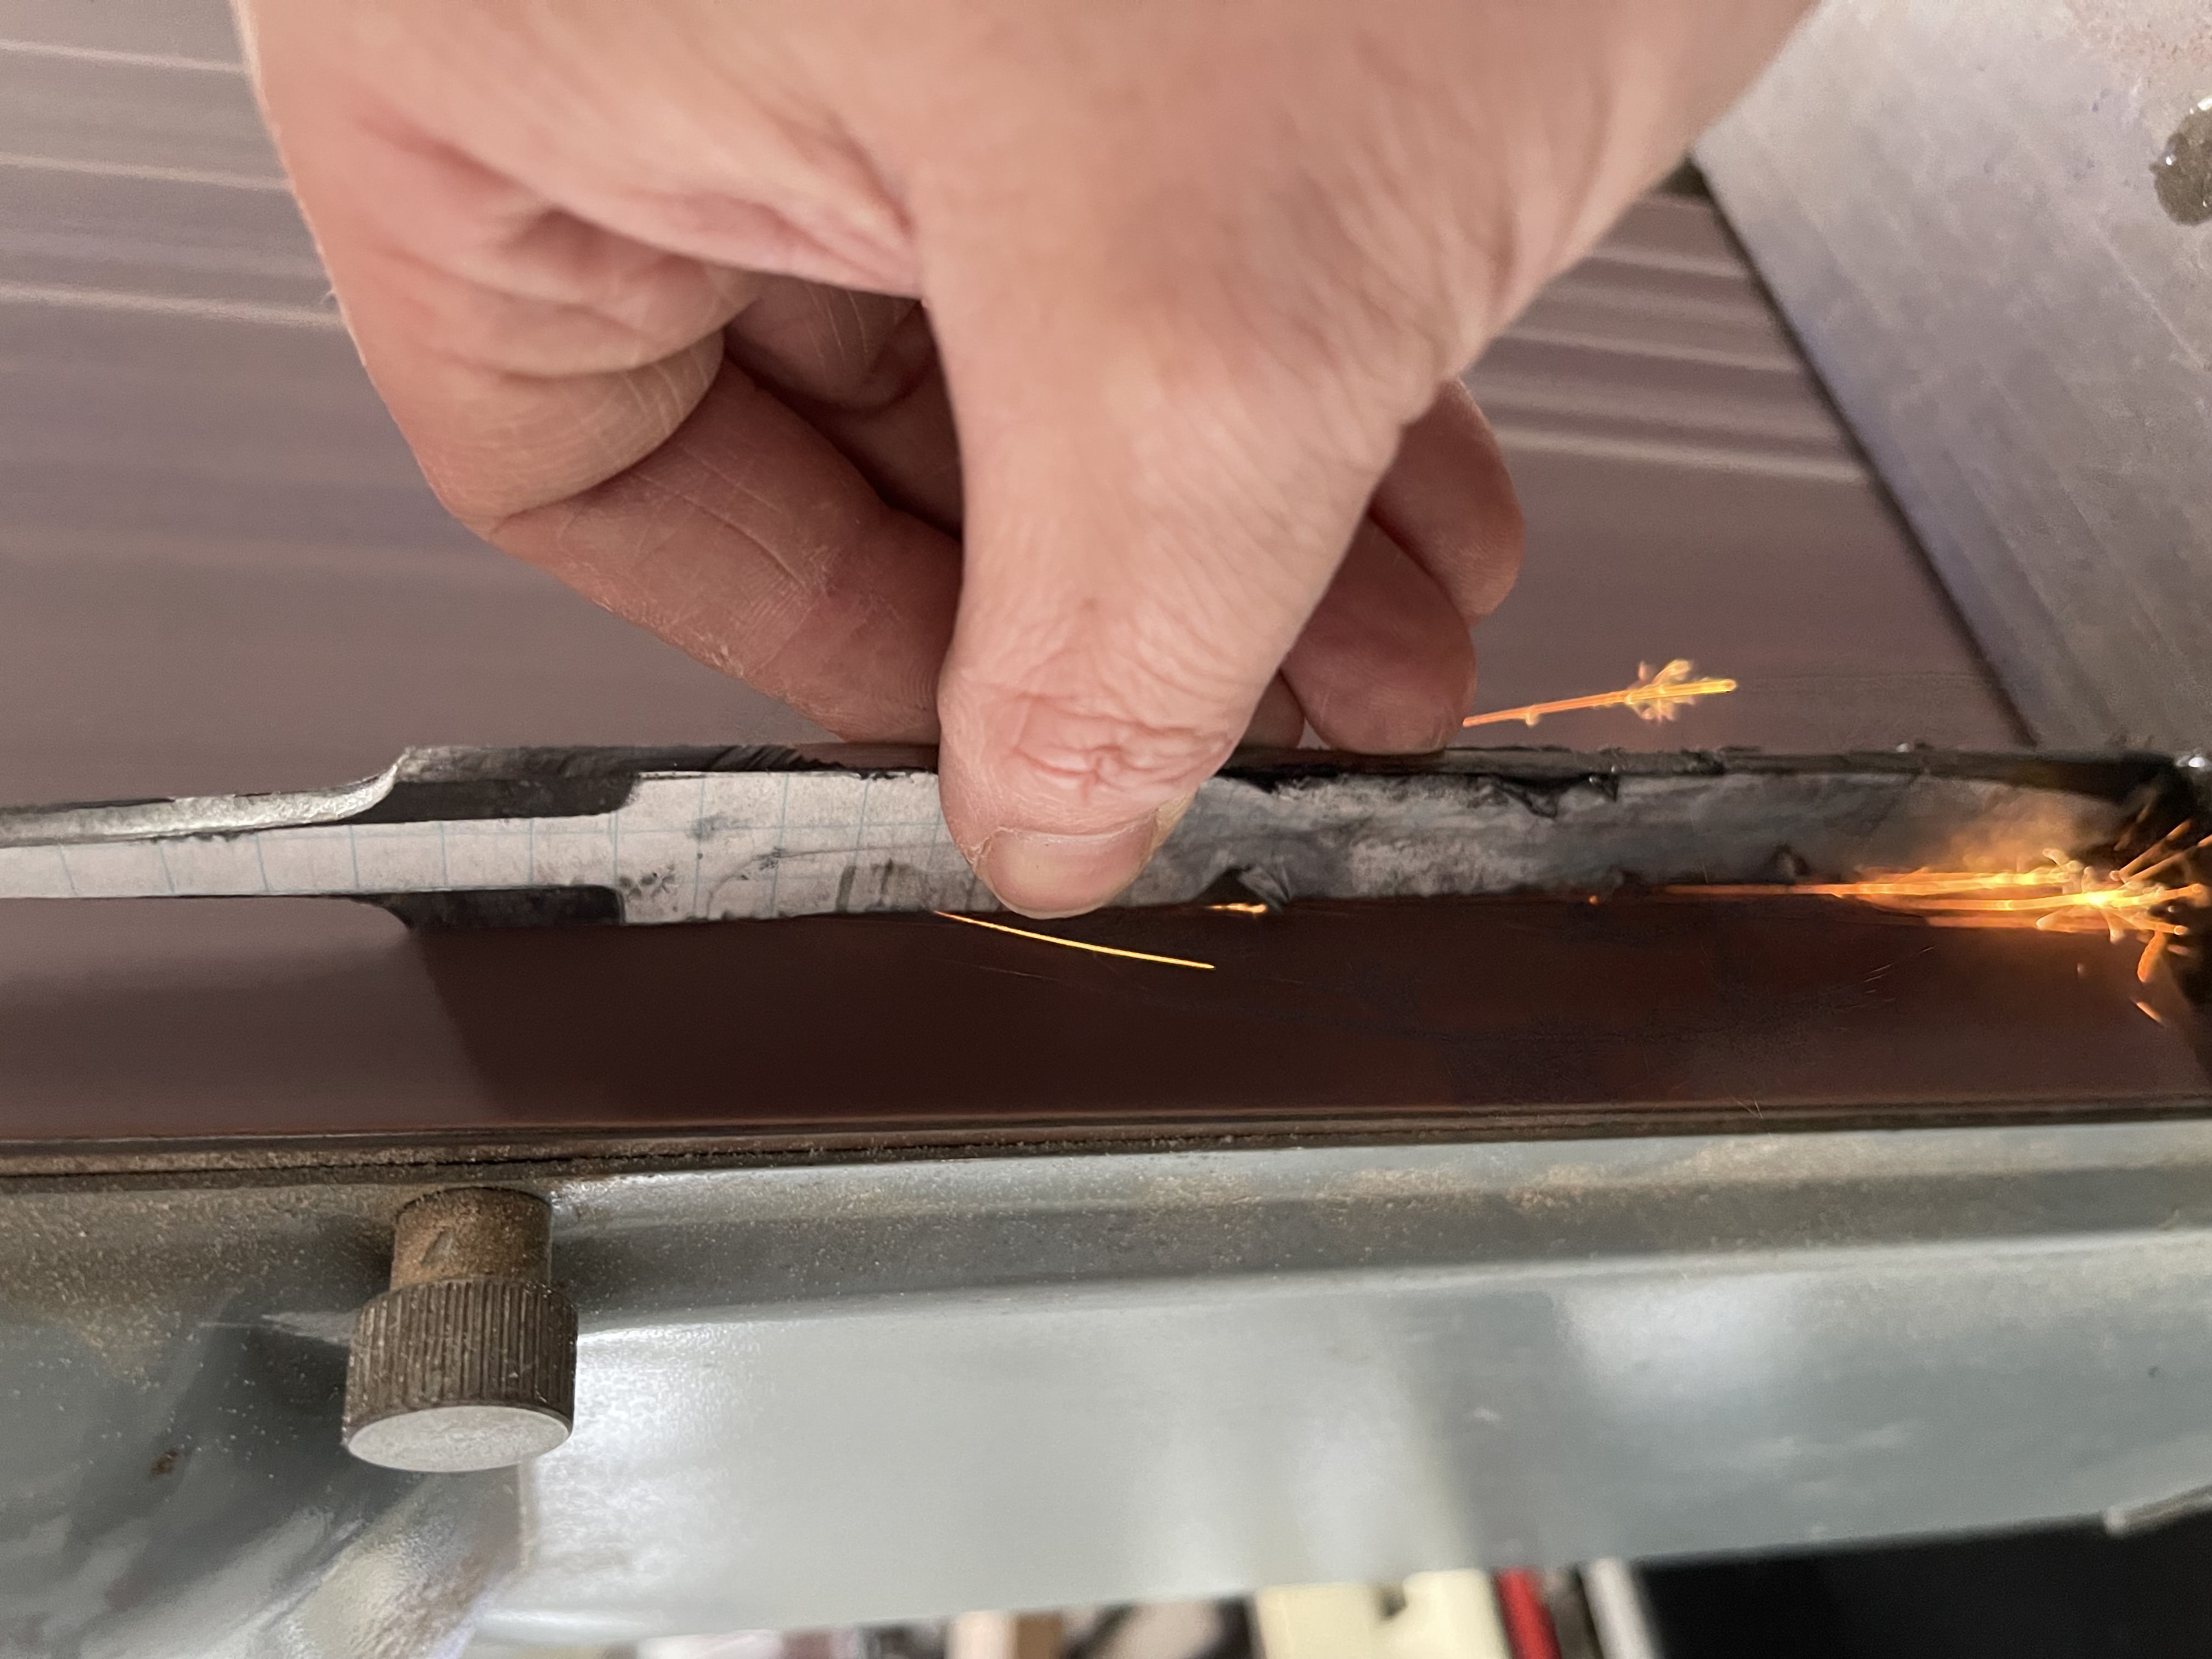
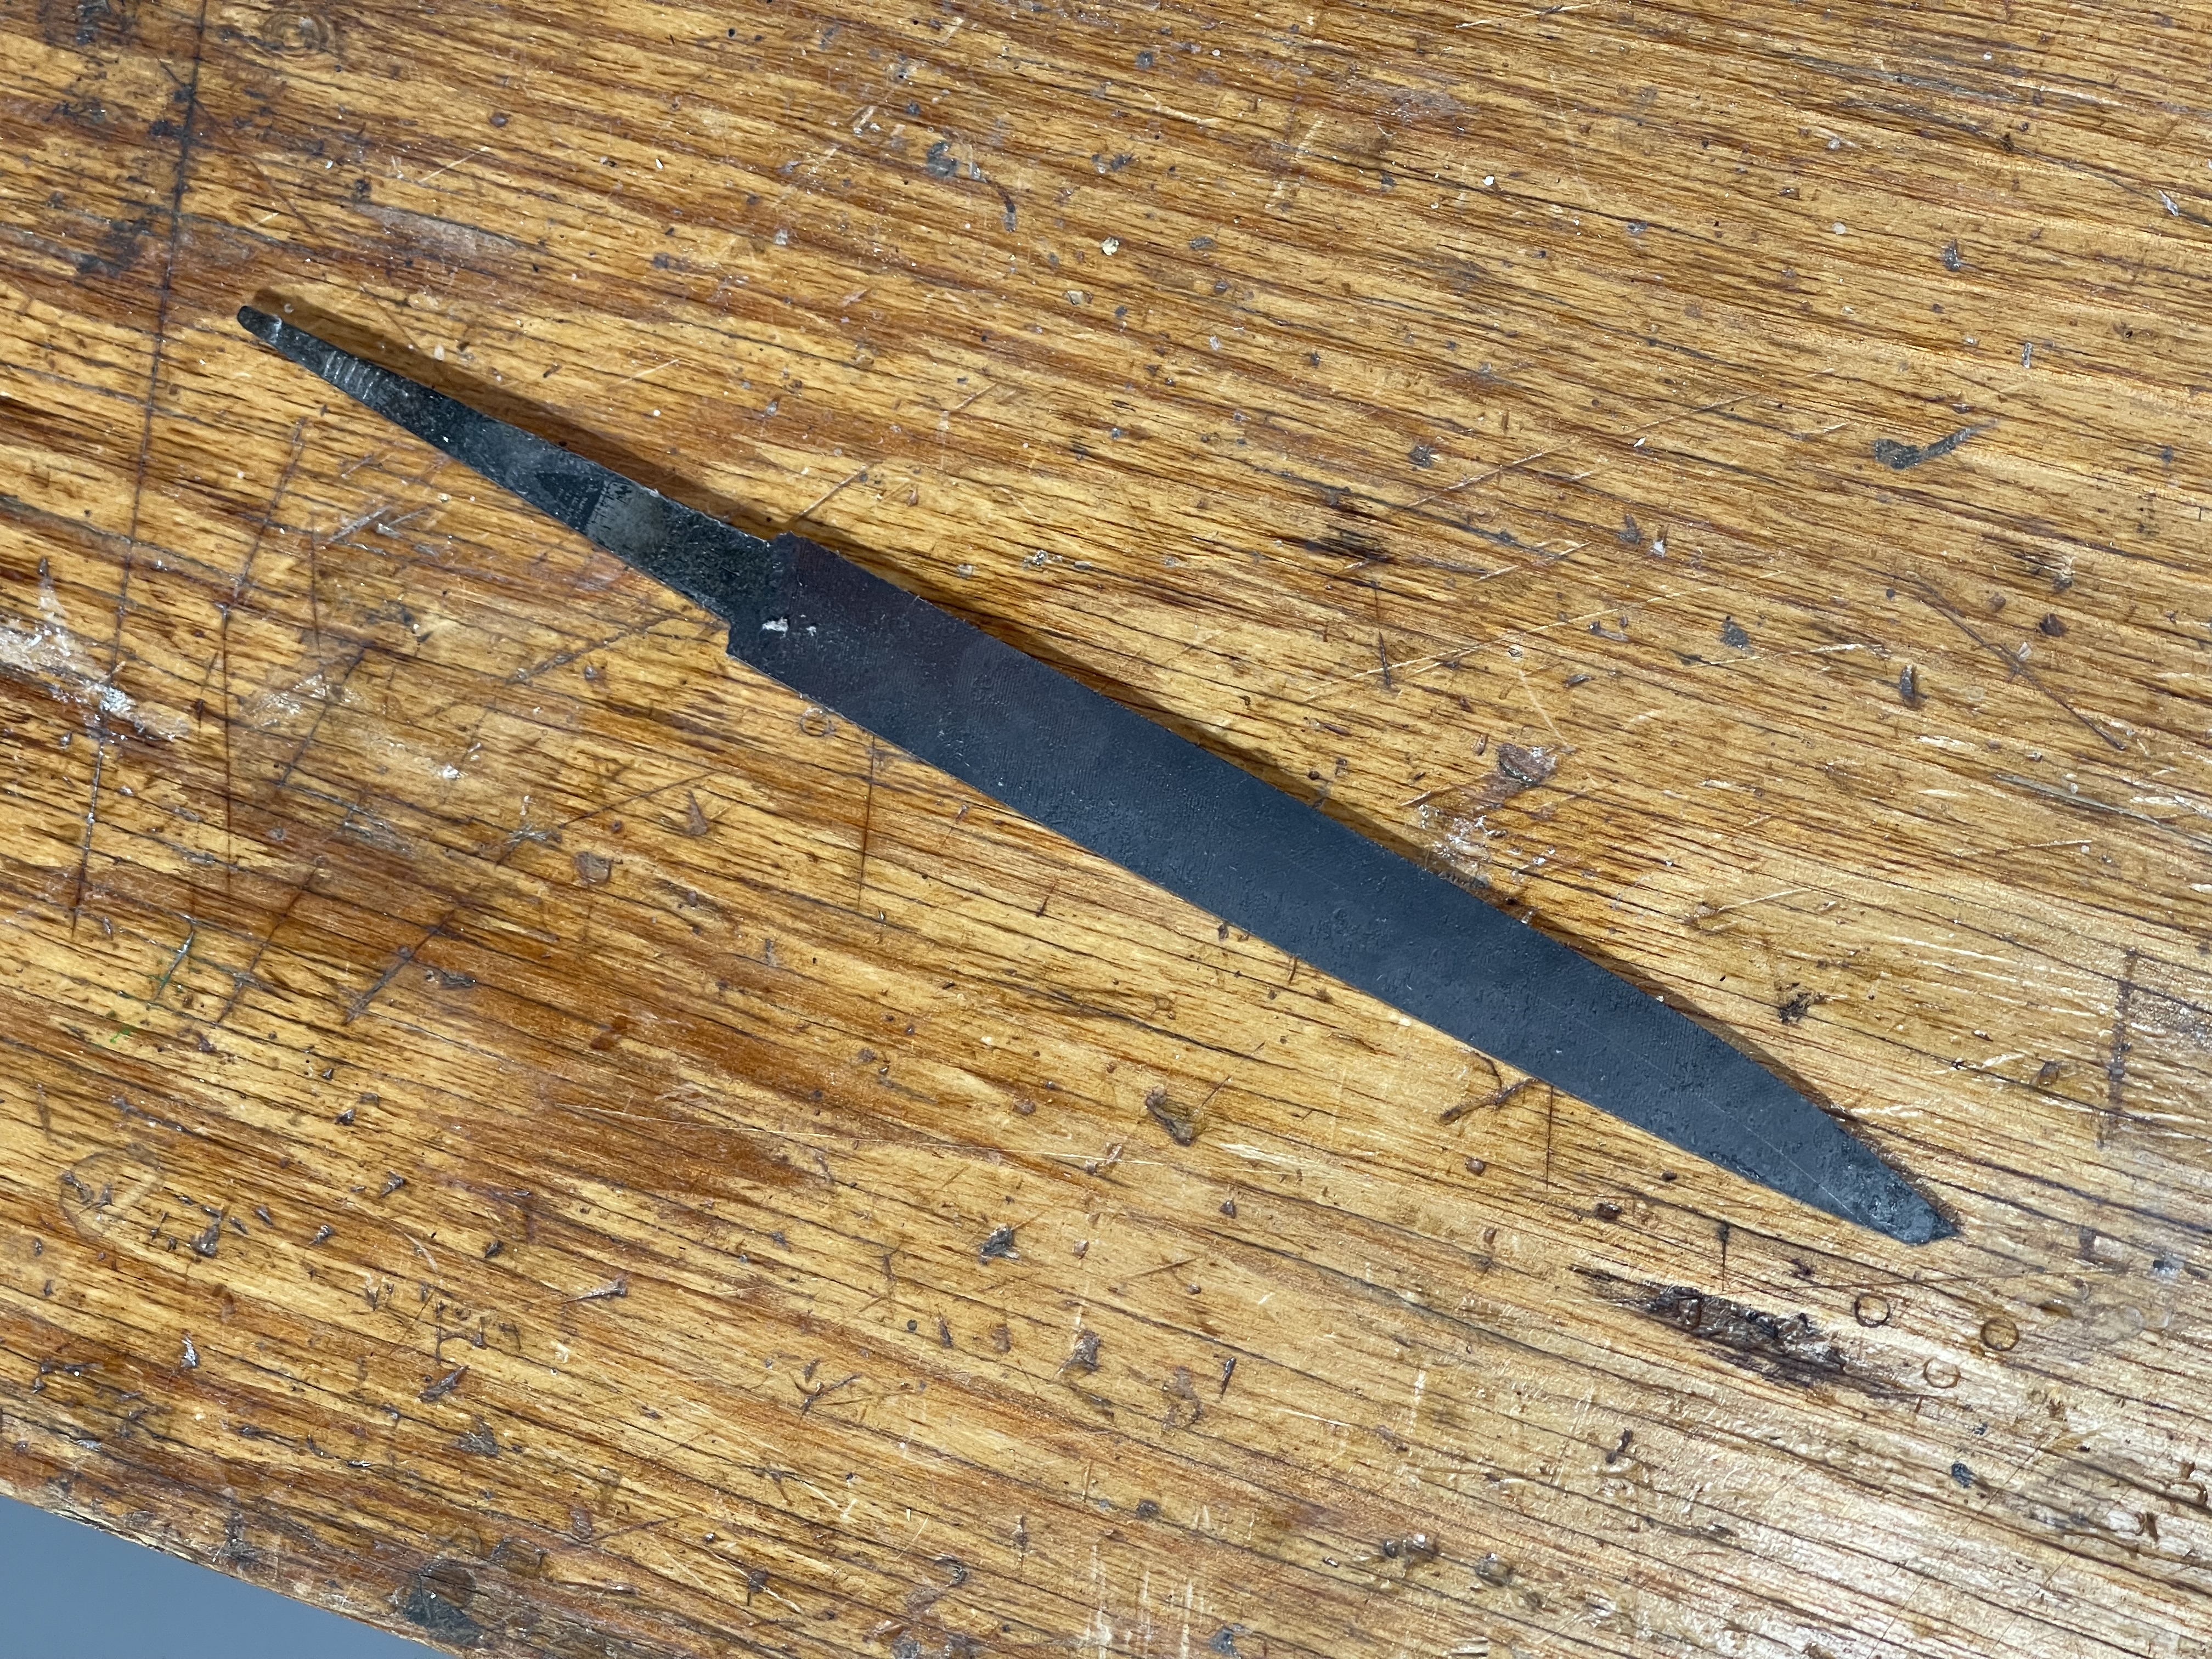
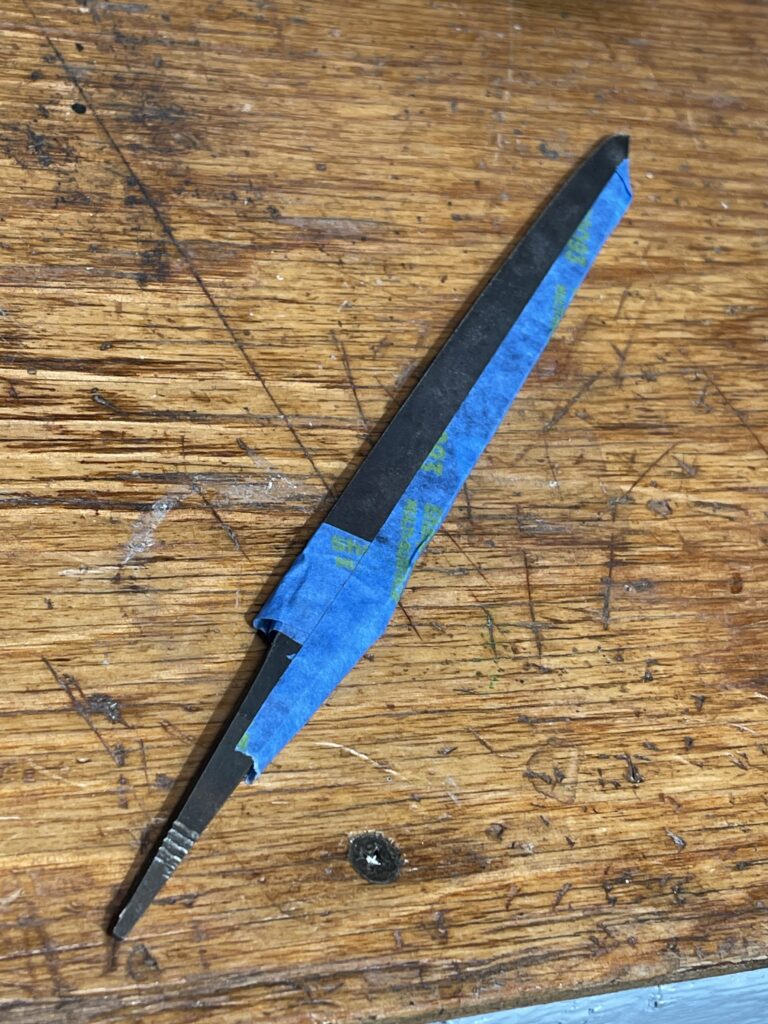
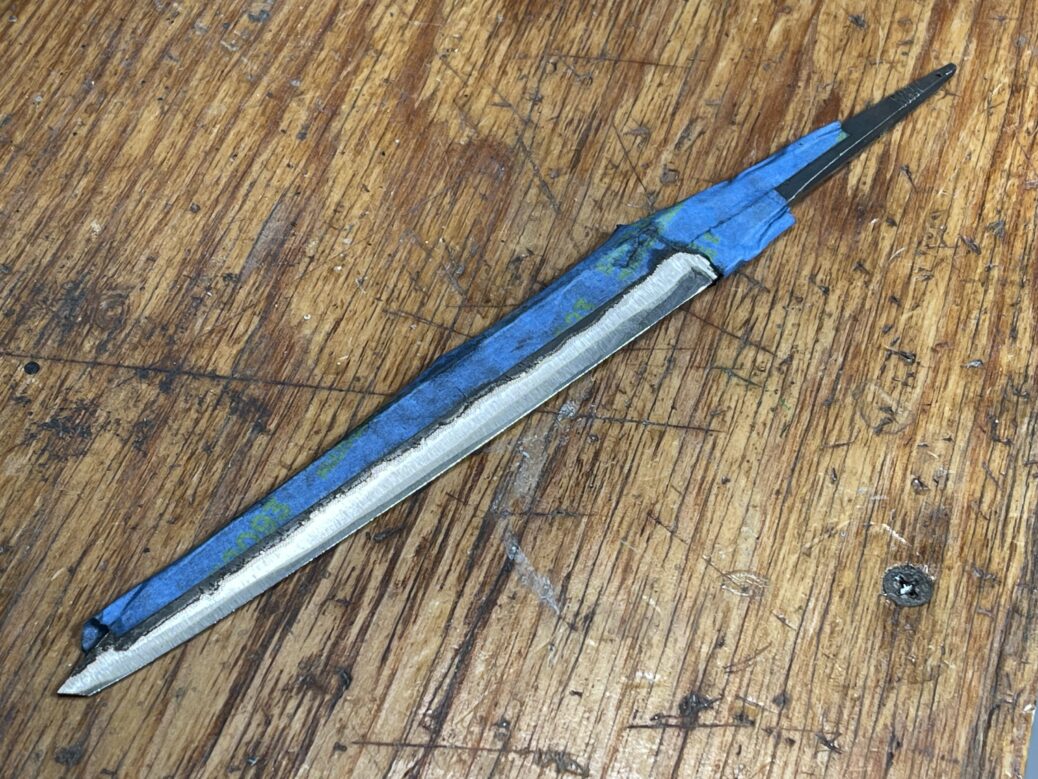
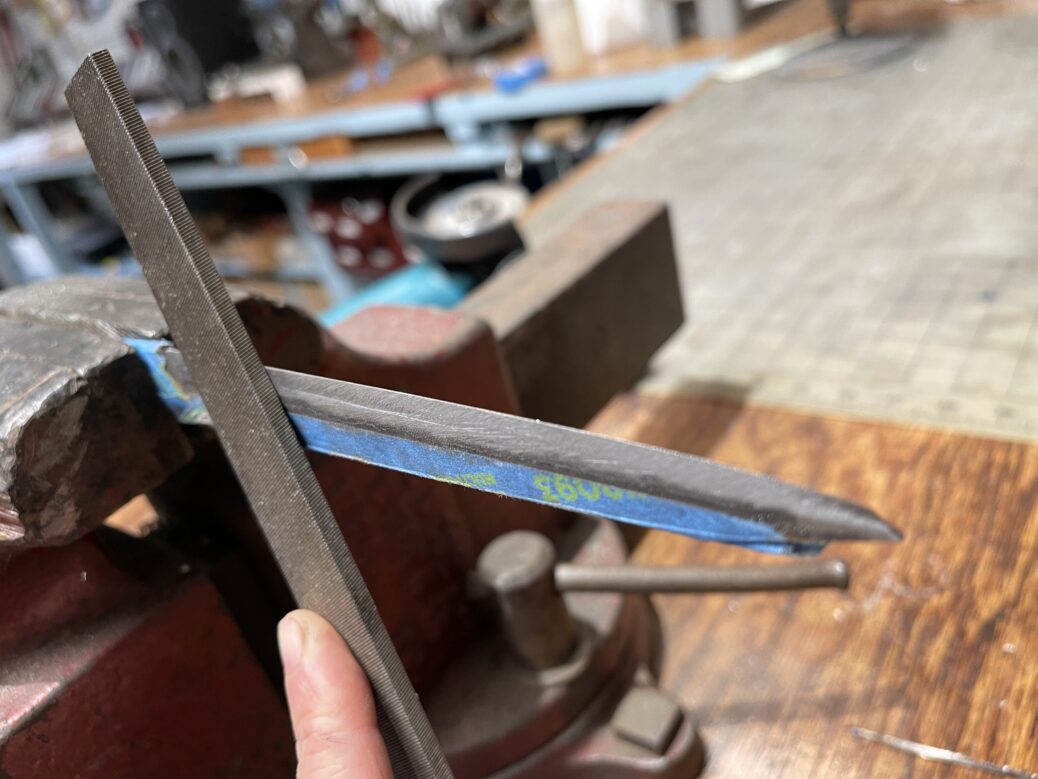
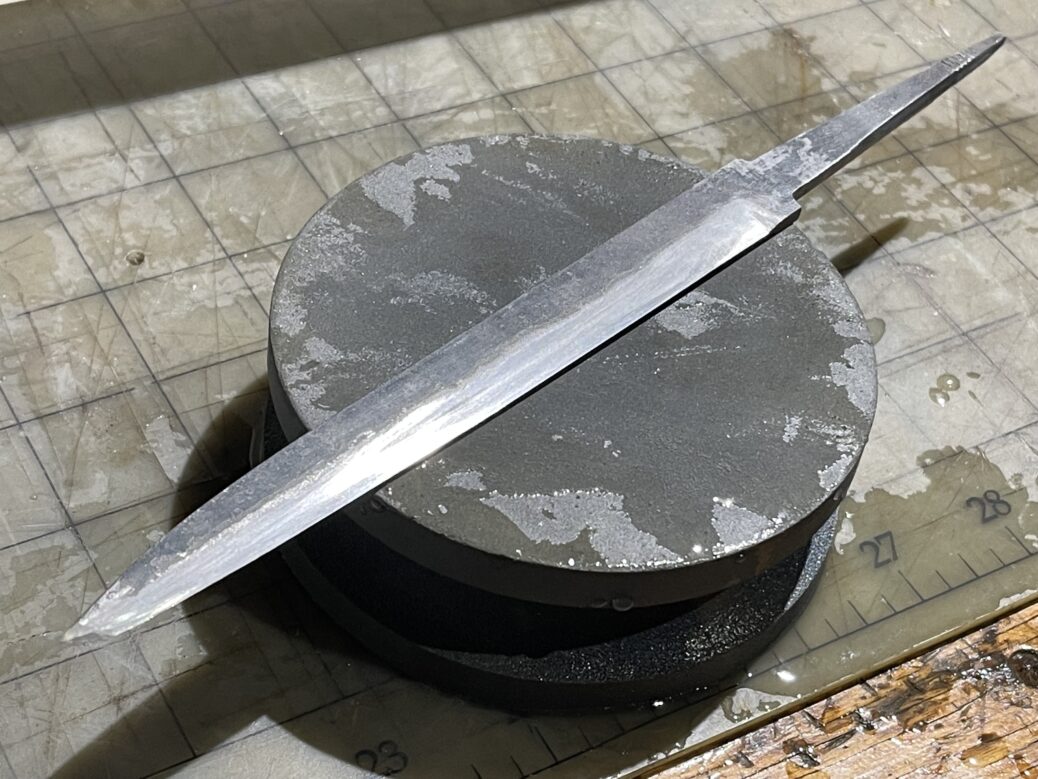
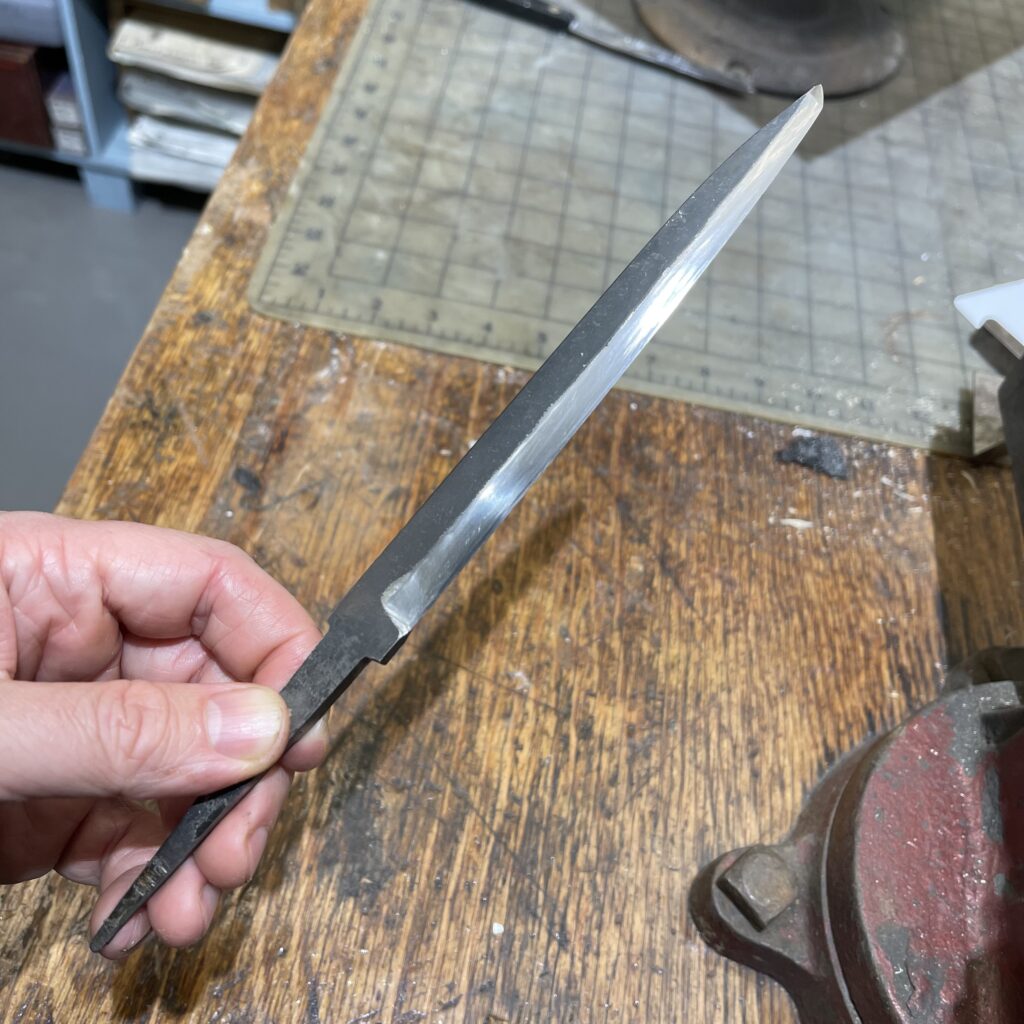
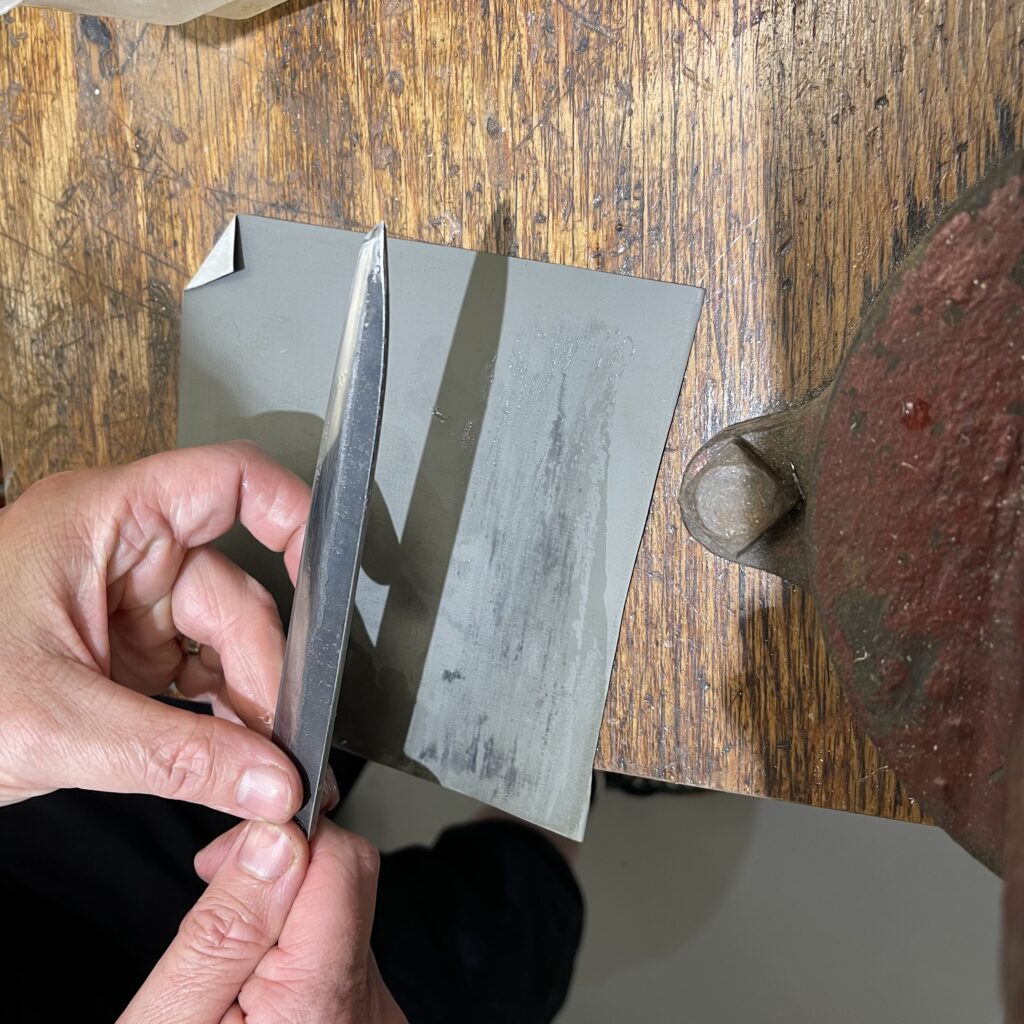
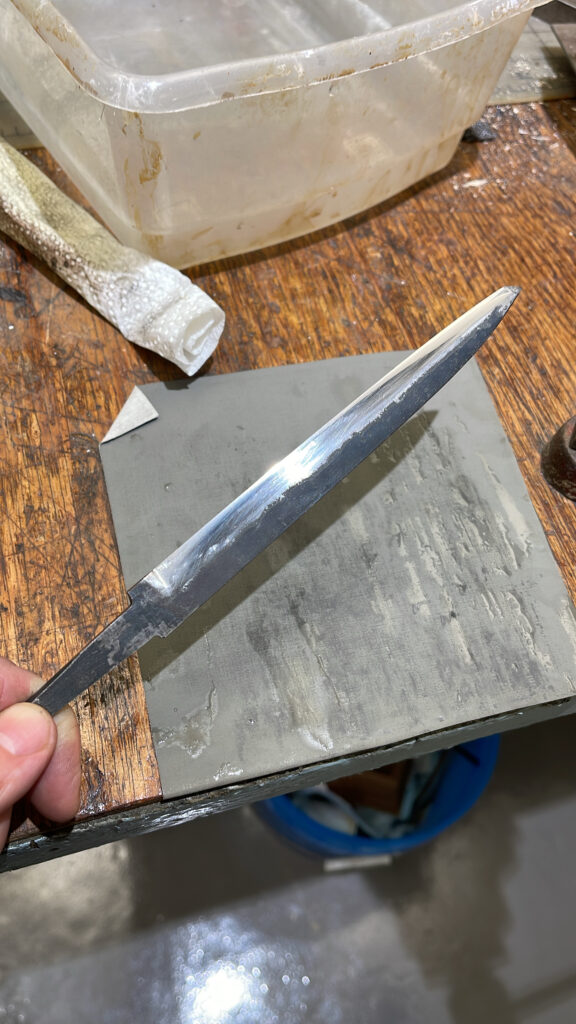
Heating an old file with an acelylene torch. I switched to propane because it’s cheaper and, unless I switched to oxygen, the same temp.Heated and hammered to give it a distal taper, which was the part that is most important to me both because it’s important to the function of the knife and because keeping the stock straight is an important skill.Surprisingly, what I learned was that I can use a lot more force than I was using. I was being a little delicate because I’m much more used to copper and silver.Even at this point, I realized tracing out the shape of blade I wanted, I was going to have a problem making the knife practical with the tang where it is. New knowledge for next time!You’ll note that the pattern hangs a couple millimeters off the edge at the point. Whoopsie!About to go at it with an angle grinder. This part was way, WAY easier than I expected.Refining the shape on a belt sander. There are belt sanders made for bladesmiths, and this isn’t one of them. It’s very handed, and therefore hard to do both sides of an object.The blade, ground to profile. That shape at the tip is something I tried on a cheap paring knife I fixed and it works great. It supports the edge at the tip and lets you do tiny, precise cuts, like between the joints of a piece of meat or to snip the skin of a clementine away from the stem.The edges taped so I can grind the bevel in.At the heel, you can see I dug in a little too deep with the belt sander. That flaw is not going to go away. Another things to learn for later!Even though this was a hard file, heating it red hot and then letting it cool relatively slowly left it soft enough to file to shape with another file. Like my favorite old Sabatiers, I’m leaving the steel soft so it’s easy to keep sharp with a steel rather than having to grind chips out of a hard edge.Grinding with a coarse, then fine stone. I should have addressed the malformed heel with the file.Polished with “coarse” Micromesh sand paper.Polished with fine, 1µm Micromesh. Polishing really only highlights where you skipped a grit. Those scratches are always going to be there.You can see my face in it.This polishing material is so good.
To finish, I’ll be making a handle out of a couple of piece of wood. A storm brought down some beautiful trees a couple weeks ago and I collected a ton of wood from oaks, maples, and magnolias. I don’t think I’ll truly be able to make this a practical knife, like I’d wanted. This one seems like it would be better paired with a shield belt, but I’ll still give it a shot to see if I can finish it into something I have a use for.
Naturally, my hands are now covered in tiny cuts. Thanks to the diamond hones, most of the edge is quite sharp. The section near the heel remains a problem and I wish I’d realized it earlier in the process! Nonetheless, it cuts well enough near the heel and is razor sharp on the rest of the blade.