My two other bikes are the Blackbird (AKA the Monster, a carbon mountain bike build by my friend Daniel) and the Yellowjacket (my Trek 6500 road/city/”urban assault vehicle”). This one’s going to need a name soon, cuz it’s almost done!
I needed some additional parts as of the last installment. Let’s see what we’ve got.
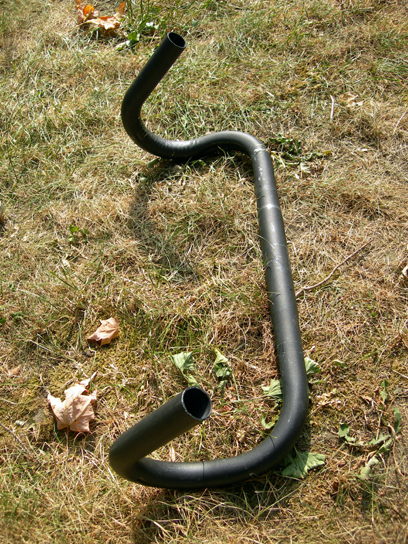
A pair of handlbars! The old aluminum ones were really uncomfortable. These were $15 used.
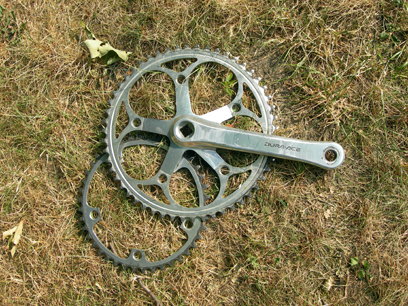
A Dura-Ace chainwheel and crank! These were originally from a $400 set and were in a pile of parts at Northampton Bicycle.
I asked if they had a used crank/chainwheel around that I could use, and they said, “no,” and I said, “What about that one?” And they said, “I don’t know whose that is,” and one of the guys said, “That’s your friend’s. He cracked the left one and didn’t want the cranks to not match,” and the guy said, “Oh, then, $10?” And I said, “Awesome.”
The bolts have been removed because I’m not going to have a front derailleur, so it’ll only have one chain wheel. The nuts, which are a little collar that goes through the space between the chain wheels are too long to work, though, and I hadn’t come up with a solution yet at the time of this picture. There’s a pic of my solution a little further down.
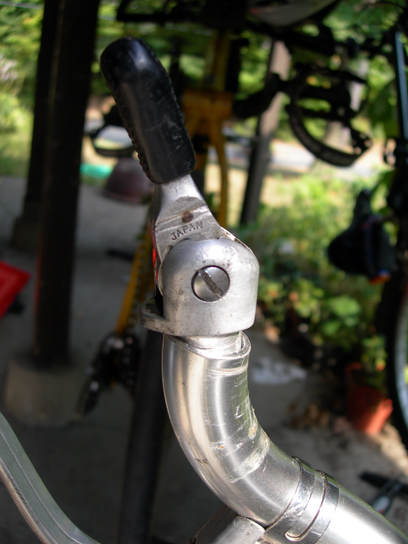
This turned out to be an unexpected problem: I wanted to use bar-end shifters, but they’re long (longer than they have to be, I think, but hard to modify in that respect), and they have to work within the curve of the bar. I had to find a solution to this for the new bars.
… and this is the eventual solution! I took after it with a file and just kept shaving off aluminum until it fit.
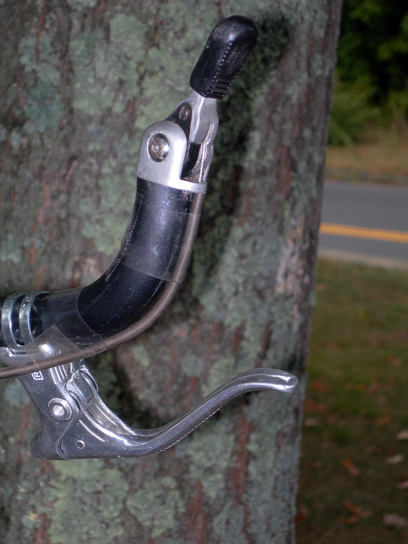
The end of the bar wound up being at a 15° angle or so. Now that I look at this again, I might take off another big chunk of bar so the shifter body itself becomes the end of the bar, since it sticks out kind of far right now.
Also note the brake levers. $3 for a set of four on Ebay. Hooray!
This is one of the pieces of my dad’s old bike. Everyone loves that bike, but it had too many problems.
My brother has taken the frame, though, and I’ve got the derailleur and a couple of other parts. We’re doing cool stuff with it. Far from being buried behind the barn, it’s being reincarnated as several newer bikes! The spring on the derailleur cable there is an idea taken from his bike, too. It used springs there, but they’re a little too shiny (and one of them’s fucked up) so I ordered some springs from McMaster-Carr and have used them here in a couple of places. I’m pretty sure they can’t be used for brake lines, though; I think they’ll take up slack by straightening, rather than stopping the bike. I’m gonna try one anyway and see if it works.
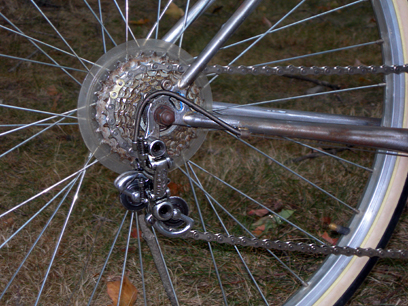
Here’s the drive train in place. Note the bolted chain wheel.
I have some concerns about the long-term viability of that derailleur, unfortunately. Even though it’s a beautiful piece of machinery, it’s not very advanced. It’s built for a 5-speed cluster, max, and that’s a 6 on there. I have a 5-speed cluster, but I’d need to build a wheel around it, which I’ve never done before. So for the time being, it’s a 5-speed with an extra sprocket.
There’s also the issue of the gear ratio. I wanted a big chain wheel on there so I could get ~5:1 gear ratio with an 11-tooth sprocket on the back. The Yellowjacket as a 4:1 and I run out of gears going downhill (and there are a lot of hills here). But this cluster has a 13-tooth, which gives a ratio of 4.07:1. I was looking for a 20% increase in speed and got a 1.7% increase. Pretty fucking weak. So I gotta learn how to build wheels and I gotta keep my eyes open for high speed clusters in the garbage.
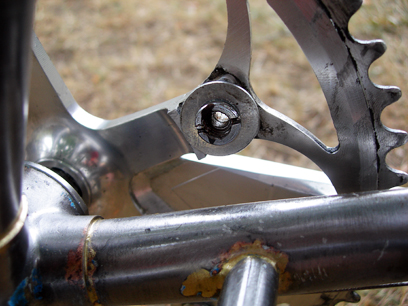
This is how I got the chainwheel bolted in: with the power of washers! If I’d been really doing what I should, I’d have cut them down to fit; right now, they rest at an angle. Oh, well!
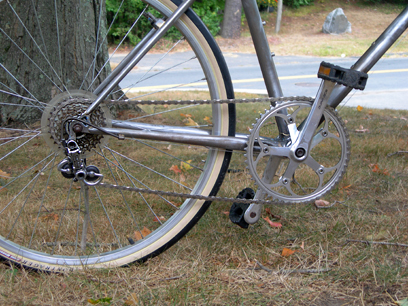
And here she is, with everything but brakes (which, thanks to Ebay, should show up any day).
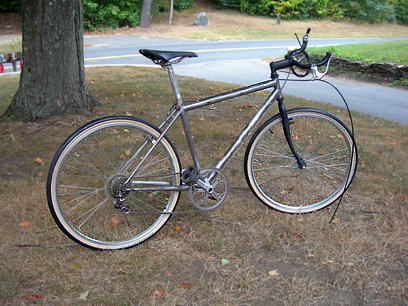
The tires are Bontrager Road Warriors. They’re 26″ (mountain bike sized) road slicks. They’re very smooth; you can really feel the difference between even a road treaded tire and these. They’re no good in sand or dirt, but as long as you’re on a reasonably clean road, they’re spectacular. The saddle was $15 at the bike shop. I think most bike shops will have saddles that people have swapped out.
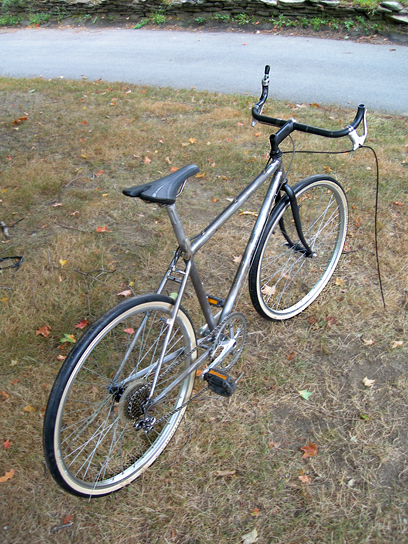
A little bigger and up-closer.
All that remains is brake installation (C’mon USPS!) and a general up-tightening, wrapping the bars, finding some bolts to fill the water bottle cage mounts, and it’s good to ride! Then the challenge will be not bolting on a bunch of stuff. I mean, if I get a flat on this bike, I’m pretty fucked, since I don’t want to put a saddle bag or pump on, never mind lights or water bottles. I’ll probably stuff a tube under the saddle if it’ll fit, but I’ll have to carry tire levers and a pump in my backpack or something. Since this bike is made for hopping around the city for errands and stuff, I’ll probably be carrying it anyway. I’ll be doing a little detailing with gaffer’s tape, too, on the chain stays, both to add a little black back there and to keep the chain from dinging the clear coat and making rust.
Almost done!
Really impressive. Nice jorb.
Thornks!
I should have this running in a couple of days. We should go for a ride!
As someone who blew a tire the other day and dragged the bike a couple thousand meters to the repair shop I must say I’m in awe.
Also, your pictures are so beautiful! These, your mechas, they all look so sharp and vivid.
You must have an amazing camera, or is it talent. 🙂
Flats are a drag. Triply so when you can’t fix on the fly. Which reminds me: I’m out of inner tubes. I gotta get some more.
Thanks for the compliments, Anders.
My camera is nothing special — a $250 PowerShot from two years ago. You should see Soren’s beautiful photos, and his camera is even crappier than mine. But I got it because of its macro feature since I obviously like little things, and the feature works pretty well.
Near as I can tell, the secret to sharp photography is good light (an on-camera flash doesn’t count — you can really see it in the two pics above where I had to use it due to failing light) and holding still. Sometimes I use a little tripod when I can’t hold still enough.
The other secret is throwing away a lot of pictures. I don’t take nearly as many as a professional does. These were chosen out of 20, though. Many of them turned out to be awful. More than one was blurry.
Then I hit up Ye Olde Photoshoppe and sharpen the focus on the things I want to be in focus, sometimes blurring stuff outside of that.
… and that’s the secret of my big “talent”!