Sleek and Frightful

OK, let’s see if I’m getting my blog fixed here with a project update.

I’ve been working on this bike for about a month since I found the frame. It came from the basement of Northampton Bikes and they sold it to me for a song, seeing that it was going to a good home. Now, I’ve wanted one of these frames since I was a teenager and I used to ride the MS150 bike ride (which looks to be a much larger event now than it was in 1988 or whatever.). So when I found this frame, I knew this was a golden opportunity. It’s a 1992 r900 with downtube shifters (so quaint!) and short but practical geometry.

I started buying parts for it when I got the frame. I’ve been getting used stuff and trawling Ebay for parts, but it’s still coming in pretty spendy. The project means a lot to me, though, so I’m willing to do what I need to do.

Now I’m going to try my newly upgraded blog’s gallery function. Let’s see if it works! Pics and details follow the fold.

Continue reading “Sleek and Frightful”

Stripping At Thanksgiving

stripWarning.jpg

EDIT: Hey, Makeketeers, I just finished the bike this eve! Check out this post to see the final product!

Like a lot of Americans, I was with my family over the last weekend celebrating Thanksgiving. Unlike most Americans, I’d come not just to hang with family, but to get some workshop time. My dad’s shop is a wonderful thing and he’s got some tools that I just can’t approximate. I’ve been working on a bike for a while now, but I wanted a hood to paint in because the weather’s gotten foul, and then there were a couple of parts that needed more force than I’m able to generate with the tools I’ve got. So I brought it along! I also had a homemade bike stand I’d made out of steel pipe and a clamp that needed delrin jaws and Dad had offered some stock and the use of his milling machine to make them. I could have made them with a band saw and drill press, but I lack a band saw and he had them already cut for another purpose.

buildClamp.jpg

The clamp clamping while the stand stands

So I got to work on the bike itself. I had to strip the paint, first using methylene chloride (nassty chemilcalses that it is), then switching to other stuff because I kept getting distracted and the stuff dried up before I could get all the paint off properly.

stribBB.jpg

An out-of-focus picture of the methylene chloride attacking the enamel.

stripClose.jpg

It took the ink right off the decals, but unfortunately left the decal substrate there. Invisibly. That had me stumped for a while.

stripFrame.jpg

This took me all afternoon, half a can of methylene chloride, and a surprisingly small amount of MEK. I don’t know if the MEK (methyl ethyl ketone) would have worked first. The stuff sure seems less nasty than the methlylene chloride, though. And as far as I know, it doesn’t REDUCE THE BLOOD’S OXYGEN CARRYING CAPACITY.

In any event, there was a fair amount of scraping and even some sanding at the end. Had I been on the ball a little more and gotten to use the methylene chloride at a stretch instead of having to run off and do family stuff, all the paint would have just flopped off.

paintOrangeLayer.jpg

That orange is an undercoat for masking purposes. The seat tube was an aborted idea.

paintMask.jpg

The top tube masked with electrical tape. See where that tape overlaps? That’s a little problem. Thinner tape cut at the edge would have been a good idea. No big deal, fortunately.

paintGrey.jpg

… then I painted the whole thing “Machine Grey”. I really like this color.

paintUnmask.jpg

Then I removed the mask. Rock. Yeah, I painted a lot of orange, then wanted just a little. I tried a bunch of patterns before I came up with this one.

paintMaskClose.jpg

See? Kinda neat. The light was low, but the camera did an admirable job.

buildFull.jpg

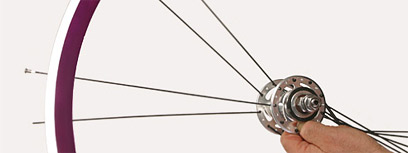
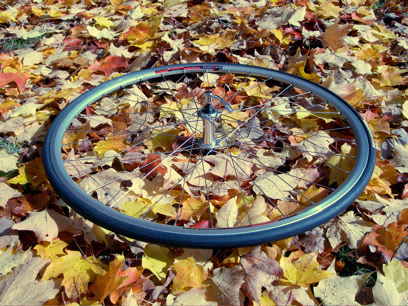
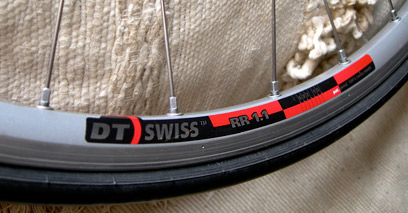
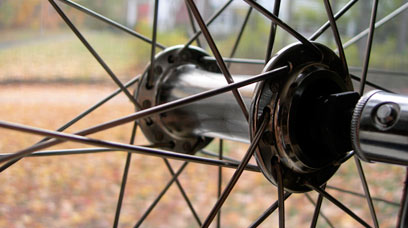
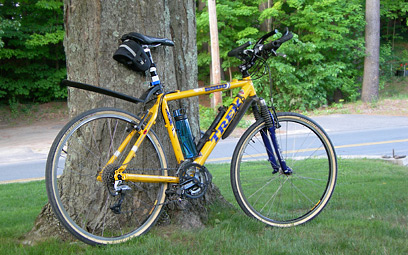
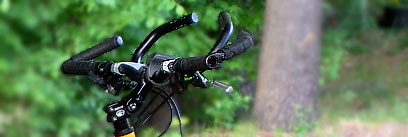
So I threw together a bunch of the parts, and it starts to look like a bike! These are the wheels I built in a previous post, as well. Most of the parts, including the frame (from a Trek 7300) were from various folks on Ebay. As always, caveat emptor: the bottom bracked turns out to be cross-threaded, so I have to have it retapped tomorrow at Full Circle.

I think the cranks are gonna come off the Iron Monkey, which will then get my brother’s old cranks and chainwheel. I want the 53:12 ratio! I wanna haul ass! The Iron Monkey will probably be mostly ridden by guests (once I fix it up with a new rear wheel) who probably won’t appreciate a gear you can only be in for 5 minutes of the ride anyway.

And that brings me to a serious question: what should I name this bike? I called it Mithrandir over on Velospace for need of a name on the spot, but it doesn’t make me happy. Too nerdly. I’m happy to take recommendations, even ridiculous ones that I’ll reject out of hand because they’ll make me laugh.

Wheel in the Sky Keeps on Burnin’

Building a Wheel

There are a few things left on a bike that I’m kind of afraid of. Off the top of my head, these are headsets, unsealed bottom brackets, and wheel building and truing.

No, wait, cross off the wheel building and truing parts.

A very generous friend gave me a gift of project budget, so I decided this was my big chance to conquer that last fear there. I got myself a Spin Doctor Truing Stand II, a set of spoke wrenches, and a dishing tool. Then the challenge was to get parts.

Building wheels is not a cost-effective way to get wheels normally. Decent spokes cost about a buck apiece and modern wheels have between 24 and 36 of them. Hubs generally go for $20 and  up (and I mean up) and rims start at $30 and go up equally amazingly. Tires start at around $15 and tubes around $7. So that’s about $100 for a minimally acceptable wheel. You can get them prebuilt for $50.

But if you apply your scavenging skills, things might come out differently. I went down to Laughing Dog and asked if they have any straight but used rims. The guy said, “Nnnn…yeah!” and handed me a DT Swiss RR 1.1 rim. It has a little piece of metal in it that rattles around, so they can’t sell it. The dude gave it to me. They’re $70 new. Then, it turns out Nashbar has a sale going on with old Specialized hubs for $6. $6! So I got one and paid $9 for shipping. I’d have gotten two if I foresaw making two front wheels in the near future. Spokes are always in demand, so no deals on that, but Northampton Bike stocks lots of spokes, so I got 36 (that’s 4 extra, in case I fucked something up). And the Pedal People were dumping a bunch of stuff, so I picked up some appropriate and speedy tires and a tube fer nuthin’.


So I got down to it yesterday afternoon. This is what I made.

Whole built wheel

The complete wheel. I love the way aero rims look. I totally lucked out with that find.


Rim

See? Pretty cool! I’d really like to get some Deep Vs, but that will take more scrounging.


 The hub, all laced up.

 The whole hub. If you know about these things and see a mistake, let me know!


The bike is, so far, a Trek 7300 frame from Ebay that I got for $40 shipped, a bottom bracket from a bike that had been sitting on a rack for 6 years, this wheel, any of several cranksets I’ve got, a seat post, an assemblage of derailleur parts that I think equal a derailleur, some brake levers, some brakes, and these bars:

 The Badassest bars in the Universe

If you’re wondering if these are the badassest bars in the Universe, the answer is yes.


So, I still need everything for the back wheel (ideally, a 5-speed casette), shifters, a saddle, another tube, a chain an appropriate chain wheel, a fork, and a headset. Scroungemonkey go!

Rollin’ Rollin’ Rollin’

Vincent and Joshua clean a chain

Vincent and I spent last Saturday building him a bike.

Originally, the bike was a $20 yard sale Mongoose, purchased on Martha’s Vineyard and mostly left outside since, that I’d taken apart to see all the parts that I was usually afraid to take apart. Then Vincent needed a bike. So back together it went!

Running cables on Vincent’s new bike.

He bought a new saddle (the old one was eaten by mice) and new cables (eaten by rust) and some paint for the front fork (which would eventually be eaten by rust) and we set about assembling the thing. We had a ball.

Vincent is so badass!

I also haven’t taken pics of my bike, so here are some pics of that, too. It’s a Trek 6500 with Bontrager Road Warrior road slicks, some cheapo aero bars and an adjustable stem. I’d like to put more of a front mudguard on it and figure out a way to tighten the front suspension up some more.

Joshua’s bike.

The handlebars are hard to understand. Here’s a detail:

Joshua’s handlebars.

The difference in speed with the aero bars is really interesting. Not only do I get to duck out of the wind, but it feels like I can push really hard on the pedals. Someday soon I’ll get a computer and see how much of that it imaginary.

(Thanks to Carrie, who took the pics with me in them!)