We’re doing Key Informant Interviews for the primary audience for Libertech right now, which is cosplayers. We want them, as an artistic community that enthusiastically shares technical information, that skews less white, male, and straight than many more well-served hacker communities, to have our support from the beginning. And that means finding out what’s hard.
We’ve been surprised to learn that this community that is overflowing with manual, technical skills with dangerous tools and very specific materials doesn’t, on the whole, know how to solder.
I don’t think soldering should be a critical skill for soldering. It’s definitely important to be able to do, but it doesn’t solve every construction problem and it doesn’t engage the conceptual challenges in electronics; instead, it acts as a barrier to entry.
So I sat down to figure out some preliminary ways to connect a microcontroller (or, really, any low-voltage electronic system) using tools one could find in a cosplayer’s toolbox. Here are my first experiments!
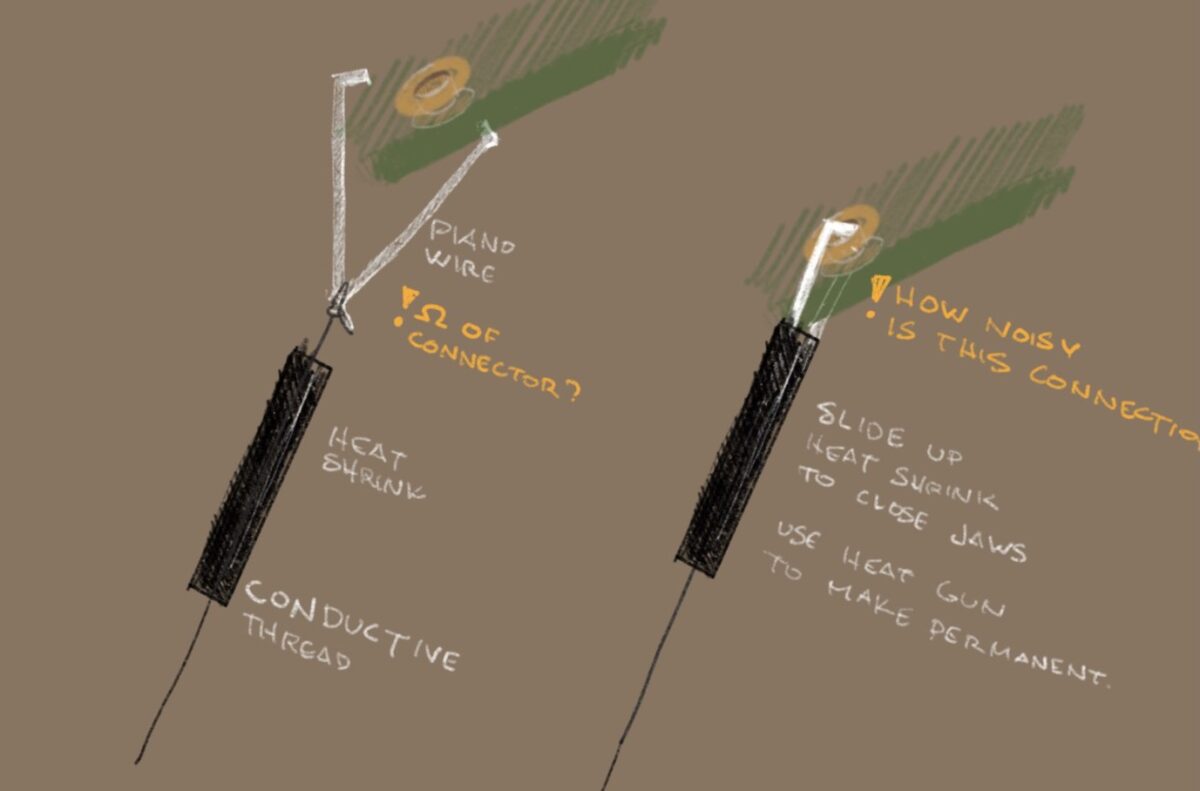
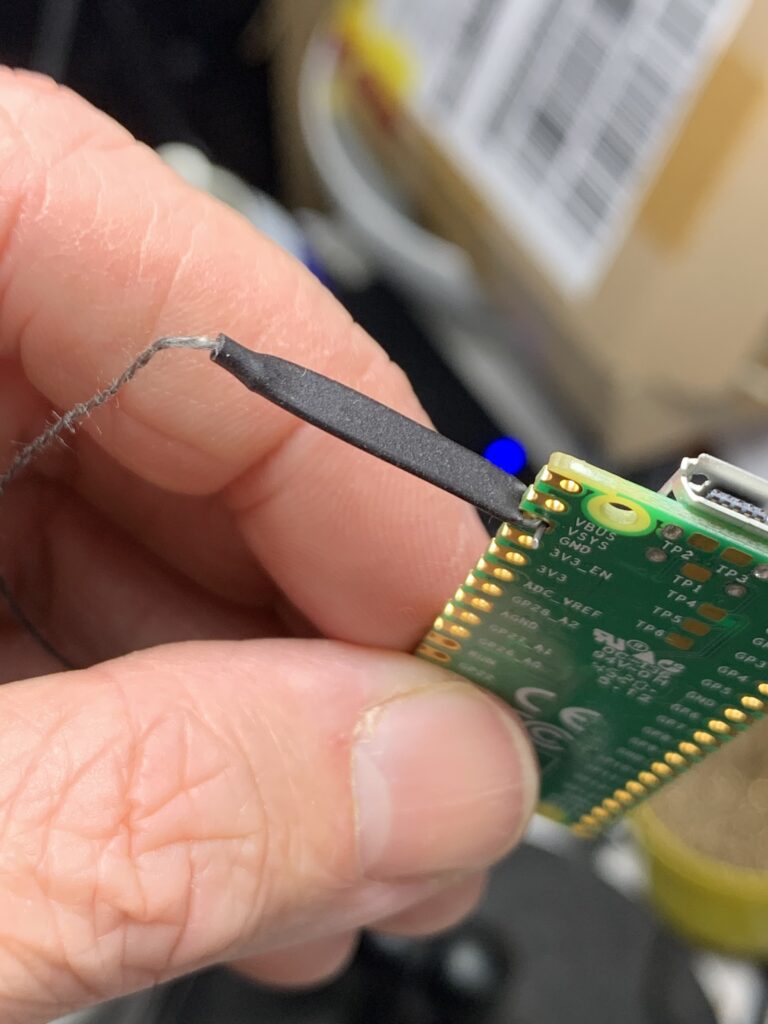
The first thing that I wanted to do was to connect to microcontroller leads so we have a way of connecting out to a larger substrate. I decided to use conductive thread, which is commonly used for soft circuitry. The concerns are:
- The material has a high resistance compared to wire — about 1Ω per centimeter for high quality stuff like I’m using. Copper wire has a resistance so low you can’t measure it with any workshop tools at a range you can fit into a project.
- Threading and knotting each output to a through-hole or a component lead is tedious and hard to undo, which is frustrating and bad for rapid prototyping.
- Thread is not insulated, which leads to short circuits all the time.
- Thread are incompatible with solderless breadboards.

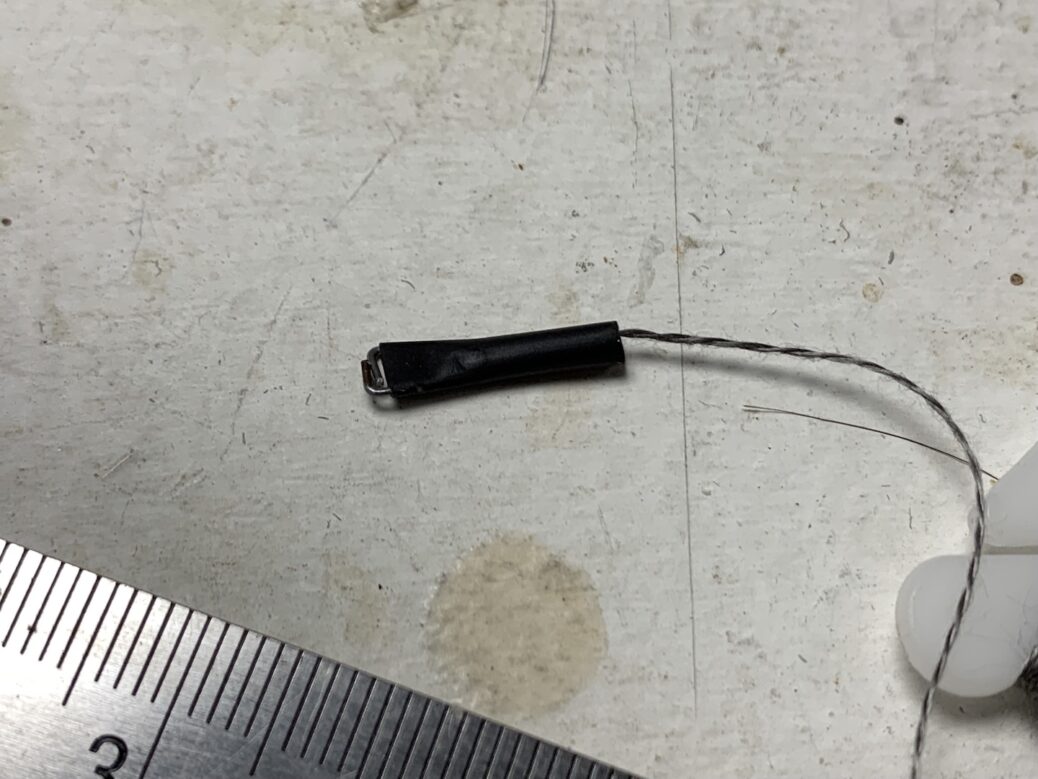
So I started looking for tiny alligator clips that were insulated near the clip, but I couldn’t find any that were small enough to keep from excluding their neighbors at the hobby standard pitch of .254mm. Which meant it was time to Make A Thing!
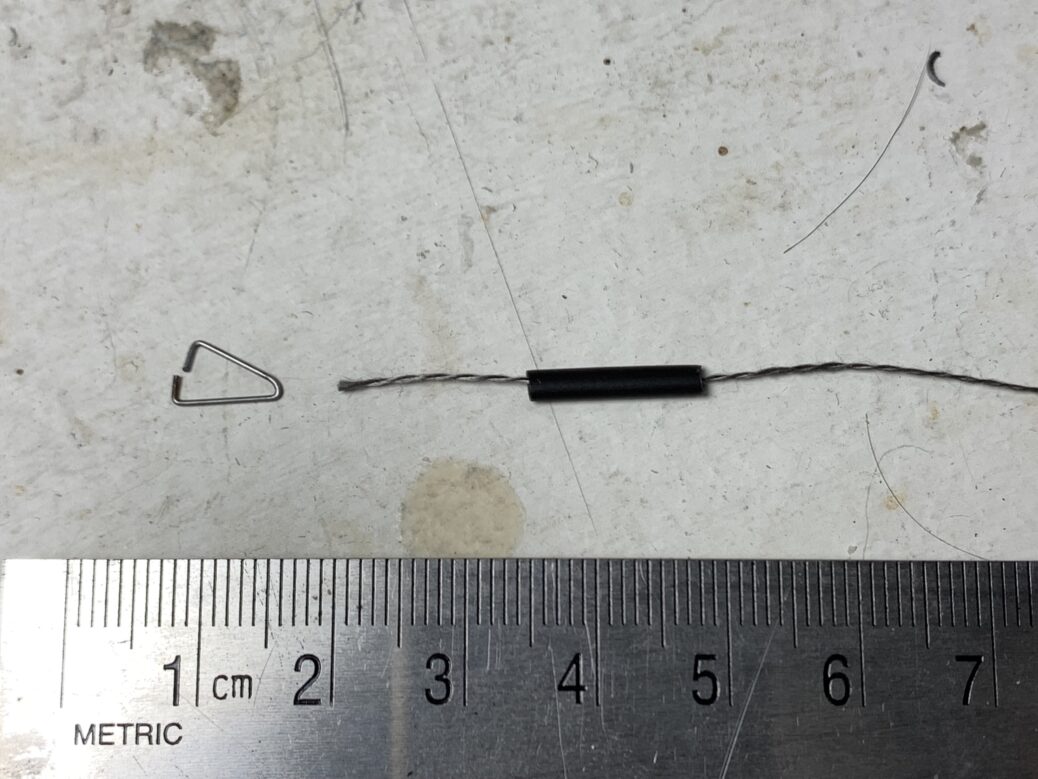
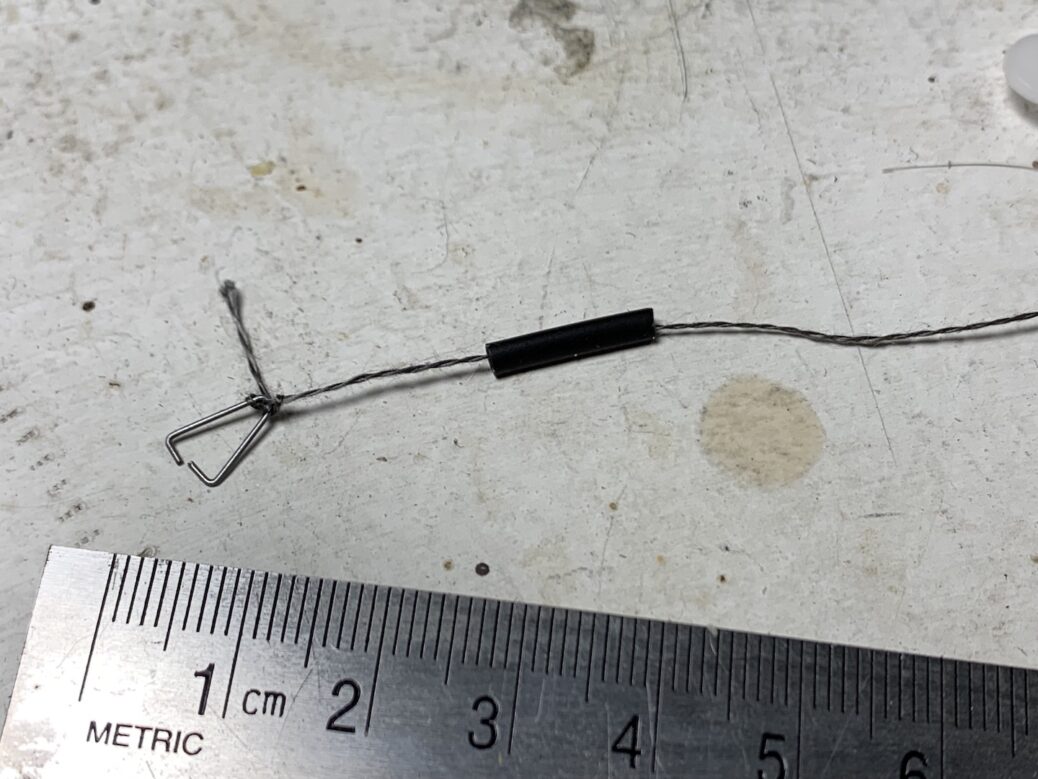
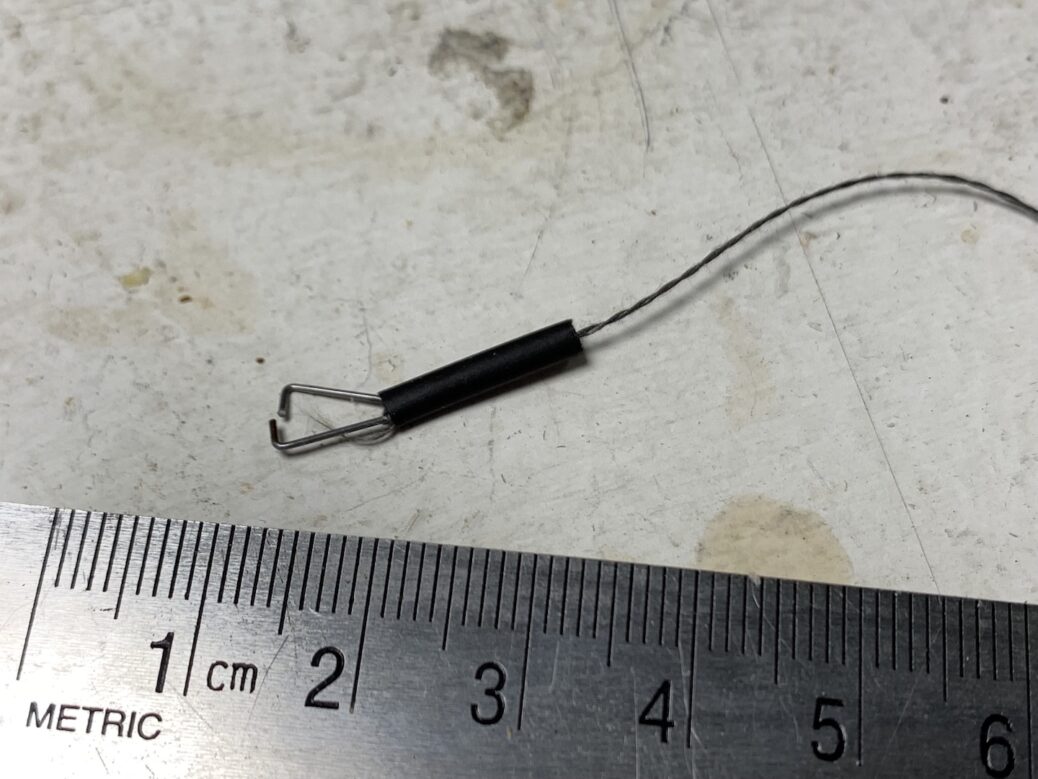
My main material interest in designing such a thing was that I make the clips of regular hobby materials, rather than specialized ones. To that end, the materials are:
- Music wire: 0.5mm. I think slightly heavier might work better, but this was the first thing I tried and it worked really well.
- Heat shrink tubing: 2.5mm. This dimension might be important, but the stuff is stretchy so it might work if it’s a little smaller.
- Conductive thread
The tools are:
- Wire cutters: heavy duty. You’ll have to cut steel. I tried my electronics ones and every cut ruined that section of the blade.
- Fine, needle-nosed pliers, sized for jewelry. I love my Xuron “Tweezernose” pliers. There are others like that that might work.
- A heat gun to shrink the heat shrink and make the work permanent. Normally, I’d say you could use a lighter but the thread is so susceptible to melting, I dunno.

I don’t think the jaws need to be this long, either.
A variation can plug in from the top. Making this one permanent would be more difficult, though it resists being unplugged like an aux plug. It still pops out after jiggling like you’d expect in vigorous use would unplug it, though the connection is positive.


The clip itself measures about 5Ω, which is small, but not nothing. The much greater resistance comes from the thread, which, at 1Ω/cm, means that a 10kΩ potentiometer could have its extremes offset by 1% over the course of a meter. Definitely not a big deal if you’re writing your own logic flow.
I’d like to do some more experimentation, like making a version that’s breadboard compatible — though breadboards have their own conceptual hurdles. I’m most inclined to try a fabric breakout, a conductive circuit board that can be sewn into a piece of clothing.
I wonder if embroidery services can do conductive thread.
